Sunday, December 18, 2011

A Little Rusty

A couple of weeks ago now I got a phone call from the Master Gardener office asking me about a citrus problem. It is very hard to try and diagnose an issue over the phone. It was described to me as being brown all over the skin. I immediately thought of some kind of rot, but the peel was not soft or mushy. I was going to try and run by the office the next day and see if I could figure it out. In the meantime I got Maggie, the Master Gardener on duty at the time, to look up a few things online that it could be and call me if she found anything that looked like it. Well, that advice saved me a trip downtown. She figured out that it was indeed Citrus Rust Mites. Since this happened, I have actually had a couple of other people mention this same issue to me so once is a coincidence, twice or more is a problem.
Phyllocoptruta oleivora or Citrus Rust Mites are long, wedge-shaped and light yellow, measuring about 0.1 to 0.2 mm long, generally they are not visible to the naked eye.
The rust mite feeds on the outside exposed surface of the fruit. Feeding destroys the rind cells and the surface of the fruit becomes silvery on lemons, rust brown on mature oranges and grapefruits.
It looks like this:


Visible characteristics of injury differ according to variety and fruit maturity. While the primary effect of fruit damage caused by Rust Mites mainly is cosmetic, which causes there to be a reduction in grade of the fruit in the fresh market, there has been other conditions which have been associated with severe fruit injury, including reduced size, increased water loss, and increased drop.
Leaf injury caused by feeding of these mites can exhibit many symptoms on the upper or lower leaf surfaces. When injury is severe, the upper surface can lose its glossy character, taking on a dull, bronze-like color. Lower leaf surfaces often show yellow degreened patches. Complete defoliation is rarely an issue. Very high populations can reduce tree vigor.

I mentioned that these things are very tiny. The mite has an elongated, wedge-shaped body about three times longer than wide and under magnification they look like this:


Rust mites tend to seek out high humidity areas away from direct sunlight but also avoid areas where dew forms. Rust mites overwinter on foliage and in bark crevasses. On foliage, mites are most likely to be found on undersides of dry, inner canopy leaves. They reproduce very quickly also, a generation may be completed in 1 to 2 weeks in Summer, but development slows or stops in Winter, depending on temperature.
A variety of predators and diseases attack citrus rust mites. Several fungal diseases, including Hirsutella thompsonii, occur naturally and, during periods of moist weather, cause tremendous rust mite population crashes. Predators of these mites include thrips mites, coccinellid beetles, dusty wings and other insects.
If you happen to have a severe infestation, or they seem to return year after year, you can use any good miticide. Please make sure you read the label and it has listed both Citrus Rust Mite and that it can be sprayed on Citrus.
The good news is, if you do end up with fruit like the picture above, it is still very much edible. Other than the possibility of loss of tree vigor, this critter only really affects the fresh fruit market. Processed fruit, that is a whole other story. You never see the peel, so what is the difference?
Chances are you will never have a problem with the Citrus Rust Mite, and I hope you never do. I wanted to present the case, just in case you go out to your tree and find the fruit looks like it has a case of the creeping crud!
Happy Growing!
Darren

Sunday, December 11, 2011

Shielded

This time of year, everybody gets busy, it goes with the season. For me, my Master Gardener duties tend to drop off significantly, though I am teaching the Citrus and fruit classes this week to the new class. Where I get really busy now is musically. I am the director of a local brass group and the Christmas season is probably our busiest time. The group does find time to have a Christmas party however, and that is where today's blog begins.
I have a dear couple that I have been friends with for many years, he plays French Horn in my group. I met them both at church back in the 80's. Mary has been asking me to come by and identify a plant in her yard for weeks, time just never seemed to be on my side. She sent me some pictures, but I couldn't make a positive ID that way. Well, the group was discussing the idea of having a Christmas party, but we had no idea of where to have it. Mary graciously offered to have it at their house. Perfect!
I could finally get over to ID this mystery plant. I figured it would be easy because the nursery I work at delivered many of the plants used in that sub-division. Then I got worried, what if I couldn't figure out what it was?!
Well, luckily, I knew the name. It was Strobilanthes dyerianus or better known as Persian Shield.


Persian shield is native to Myanmar (formerly called Burma). It is considered an evergreen in Zones 9-11, here in my Zone 8 the frost will get it, but it does come back, especially if planted in a protected area or mulched well. The plant has soft (not woody) stems which are square in cross section.
It lists as getting 3-4 feet tall with a 2-3 foot spread. I have seen the spread, but not the height, probably because of the cold.
The leaves are variegated dark green and silvery-metallic purplish-pink on top and all purple underneath. If this wasn't pretty enough, as a side note it also flowers. They are funnel-shaped, pale violet, and arranged on short spikes.


This plant thrives in humid climates. It prefers rich, well drained soil, but can adapt to a wide variety of conditions. I mentioned that it can get to be 4 feet tall. When it does, it has a tendency to fall over. To avoid toppling over, pinch it back a few times in the first half of the growing season. This will induce branching and create a thicker, bushier foliage. Maybe THAT is why I have never seen any that tall, people pinching back their plants.
You will want to keep your Persian Shield out of direct mid-day sun in the Summer. It does best with direct sun in the morning and shade in the afternoon. It will do well in partial shade, but will have better color as long as it gets lots of bright indirect light. It can be kept as a houseplant, but it is difficult to maintain since it needs bright light, high humidity, and warm temperatures. It will do well as a container plant outside, just remember, it will need more water. Persian Shield is not at all drought tolerant and should be watered before the soil dries out. Feed about every two to three weeks with a water soluble fertilizer.
When it comes to pests, they are prone to Mealy Bug problems. If you are lucky the natural enemies of mealies will assist you in their eradication. If not, an insecticidal soap will work just fine. Please make sure to follow the label directions.
Okay, lets just say you have fallen in love with this plant, not hard to do so far huh? You have one or know of somebody that has one and you want more. Never fear, more plants are as close as a pair of clippers. Persian Shield can be started from stem cuttings taken in Spring or Summer. If you have a place to do it, you can also take cuttings before the first frost gets it.
There are a couple of ways to do it. You will want to start with a cutting about 4 to 6 inches in length. Use sharp scissors, clippers or shears and make the cut 1/4 inch below a leaf node. A leaf node is the small swelling that is the part of the plant stem from which one or more leaves emerge.
The first way is to place the cuttings in some plain old water. With this method, you take a container such as a plastic cup. Fill it three quarters of the way with water. Cover with cling film and make a hole in the middle. Stick the cutting through the hole until it is in the water. In 3-4 weeks, you should have some pretty decent roots. I do not recommend this method. The roots that are formed are water roots and will have a harder time adapting to growing in soil. It will work and can be done, but you could have a higher percentage of failure however.
The preferred method is to take your cuttings as described above, dip them in a little root hormone and stick them in a mixture of one half peat and one half sand. Keep them in a warm, humid environment by placing them in a large plastic bag. Bright indirect light is everything else you need. The cutting should root within two to three weeks.
Persian Shield makes a wonderful contrast when planted in mass with a bunch of other plants such as Hosta and Coleus.


I hope you give this plant a chance, it might just be the "shield" you are looking for in that hard to grow anything shaded area.
Happy Growing!
Darren

Sunday, November 27, 2011

Pomegranate

With the holiday season in full swing now, I thought it might be nice to write an article on something that you don't see but during this time of year....Pomegranates.
I have actually been reading a lot on these things lately. The California Rare Fruit Growers Association has proclaimed this year "The year of the Pomegranate".
Down in Florida, they recently had a Pomegranate Field Day. There is some excitement down there for this fruit. It is said that this has the potential to be the next cash crop in the Sunshine State.
I also just finished reading a book by Dr. Gregory M. Levin titled "Pomegranate Roads", A Soviet Botanist's Exile from Eden. It is about Dr. Levin and his 40+ years traveling in search of wild and endangered pomegranates. After the breakup of the Soviet Union, he found himself exiled from his collection of 1,117 pomegranates.
I remember as a child getting pomegranates every year in our stockings, What great memories!
So, with all this reading I have been doing, I figured it must be fairly easy to grow them. Let's see if I am right?!
The botanical name is Punica granatum. It basically is a large shrub or small tree. The mature height can get to 15 or 25 feet high, the pomegranate is multi-branched, more or less spiny, and extremely long lived, some specimens at Versailles are known to have survived two centuries.
The pomegranate tree is native from Iran to the Himalayas in northern India and has been cultivated since ancient times throughout the Mediterranean region of Asia, Africa and Europe.


They do best in well-drained ordinary soil, but can pretty much handle anything you can throw at it, calcareous or acidic loam as well as rock strewn gravel. The tree adapts well to container culture and will sometimes fruit in a greenhouse.
Pomegranates should be placed in the sunniest, warmest part of the yard. This is a good plant for those really hot spots in your yard. There are very few, if any, places that are too hot for pomegranates. As for their cold hardiness, the pomegranate can be grown outdoors as far north as Washington County, Utah, and Washington, D.C., though it doesn't fruit in our nations capital. They actually prefer a semi-arid mild-temperate to subtropical climate and are naturally adapted to regions with cool winters and hot summers.
Once established, pomegranates can take considerable drought, but if you want good fruit production they must be watered regularly. Especially during flowering and fruit set.
When it comes to feeding,very little fertilizer is needed, although the plants respond to an annual mulch of rotted manure or other compost. If the tree is not growing well, a little 10-10-10 at the beginning of Spring and again in Early Summer will not hurt.


Photo courtesy of Flowers.VG

There are lots of places online to purchase pomegranate trees, a Google search will reveal many. The grocery store can supply you with some too. The pomegranate can be raised from seed but may not come true. The seeds germinate readily even when merely thrown onto the surface of loose soil and the seedlings spring up with vigor, usually within 45-60 days.
To avoid the possibility of having a "mystery" pomegranate, it will bare edible fruit, just the quality will be unknown, it is better to find a friend with an established tree. Cuttings root easily and plants from them bare fruit after about 3 years. Cuttings, 12-20 inches long should be taken in Winter from mature, one-year old wood. The leaves should be removed and the cuttings treated with rooting hormone and inserted about two-thirds their length into the soil or into some other warm rooting medium. One other point here to make, as seedlings, pomegranates may undergo severe fruit drop during its first couple of years of production, but this will change as the plant emerges from its seedling juvenility. Severe fruit drop should not occur with vegetatively propagated pomegranates.
If all goes well, you will have flowers. They look like this.


Usually, the fruits ripen 6 to 7 months after flowering. Of course, this will depend on the cultivar and the growing conditions. The fruit cannot be ripened off the tree. Growers generally consider the fruit ready for harvest if it makes a metallic sound when tapped. The fruit must be picked before it becomes over mature, when it tends to crack open. This can happen if rained upon or other conditions, such as too much humidity, dehydration by winds, or insufficient irrigation.
Pomegranates are relatively free of most pests and diseases. Minor problems are leaf and fruit spot and foliar damage by white flies, thrips, mealybugs and scale insects. A good insecticidal soap or horticultural oil will take care of most of these. Deer have been known to nibble on the foliage.
So, growing these things seems pretty easy huh?
The tricky part is actually eating them!
The interior is separated by membranous walls and white spongy tissue into compartments packed with transparent sacs filled with tart, flavorful, fleshy, juicy, red, pink or whitish pulp (technically the aril).


As a child, I remember ripping into a pomegranate, scooping out a bunch of the tiny red dots, and plopping them into my mouth. I would then suck all the juicy goodness from around the hard seeds and spit them out. Gross, but tasty.
There really is a more civilized way to eat them.
Something to keep in mind, pomegranate juice can easily stain your hands, clothing and countertops, if you aren’t careful.
Remember, there is no right way or wrong way, to get at the juicy insides of a pomegranate. An easy way to do it is to quarter the pomegranate and then place it into a large bowl of water. Pomegranate arils sink and everything else, skin, membranes, etc, float. Brush the arils free from the skin and membrane and they'll sink right to the bottom. The seeds inside the arils may be eaten. There are even some soft seeded varieties out there. Pomegranate seeds can be safely stored in the refrigerator or even frozen, for later use.
Pomegranate fruits are also often consumed as juice and can be juiced in several ways. The sacs can be removed and put through a basket press or the juice can be extracted by reaming the halved fruits on an ordinary orange juice squeezer. Another approach starts with warming the fruit slightly and rolling it between the hands to soften the interior. A hole is then cut in the stem end which is placed on a glass to let the juice run out, squeezing the fruit from time to time to get all the juice.
The juice is widely made into grenadine for use in mixed drinks. It can also be made into wine.
Health wise, Pomegranates are listed as high-fiber in some charts of nutritional value. That fiber, however, is entirely contained in the actual seeds which also supply unsaturated oils. The juice contains Vitamin C and B5.
Sadly, consumer demand in this country is not great. More pomegranate fruits probably wind up as decorations in fruit bowls than are consumed.
The history behind these fruits is extensive, it has been around for so long, the amount of religious symbolism is unbelievable. I will give you just a couple of examples and I encourage you to research the vast amount of information available.
Ancient Egyptians regarded the pomegranate as a symbol of prosperity and ambition. I knew there was a reason why I wanted to grow more of them.
Pomegranates were known in Ancient Israel as the fruits which the scouts brought to Moses to demonstrate the fertility of the "promised land".
It is traditional to consume pomegranates on Rosh Hashana because the pomegranate, with its numerous seeds, symbolizes fruitfulness.
And lastly, in China, the pomegranate was considered an emblem of fertility and numerous progeny. Pictures of the ripe fruit with the seeds bursting forth were often hung in homes to bestow fertility and bless the dwelling with numerous offspring.


So if you have a pregnant friend and want to really mess with their head, go out and get a picture of some open pomegranates and give it to them, then send them to this blog to explain why you did it!
Happy Growing!
Darren

Saturday, November 12, 2011

A Mini Attack

Many of my friends and family consider me "odd". I just heard many of them say "Amen". That is okay, I wear that badge with honor. However,I am like many of my fellow gardeners and plant freaks. We all go through phases of different favorite plants. For me I will always hold Citrus as my most favorite, however, there comes times when other plant families grab our attention. Don't deny it, you know it is true.
Along with my Citrus, I am heavy into Camellias. This helps soothe my competitive side. I enjoy showing and competing in different flower shows.
I also have a very extensive collection of different exotic fruits, many of which I am sure you have never heard of, Pacay, Jabotica and Mamey, just to name a few. These all live next to some of my more normal fruits, Strawberries, Blueberries, Figs, etc.
The past year or so, I have kind of gone back to my roots. Pun intended.
I really cut my horticultural teeth on Cactus' or Cacti if you prefer and Succulents. Though this time, I have aimed at the Mini Succulents.


To begin with succulents and cacti are very easy to grow. Mini succulents are even better! They hardly take up any room and if you are lucky, many will flower for you!
To start, you need to buy from a reputable nursery. there are many online. Just type in mini succulents and a slew of them will pop up. The hardest part is going to be choosing just one plant.
A succulent is any plant with thick, fleshy water storage parts. Succulents store water in their leaves, their stems or their roots. These plants have adapted to survive in very hot, dry conditions throughout the world, from Africa to the deserts of North America.
After you have chosen one or two of them or maybe fifty of them!! I am telling you, it will be tough just to pick a few! You will need to start them off right.
Find yourself a nice pot, make sure it has drainage holes. You can use clay or plastic, it is completely a personal choice, the plants don't care. Many cacti and succulents have shallow fibrous roots and do not require or use the full depth of a standard pot, half pots or pans can be a great choice. Putting a shallow rooted plant in a deep pot can be counter-productive as the soil below the reach of the roots will stay wet for prolonged periods of time after watering and may become stagnant.
Buy a commercially packaged soil mix that is made especially for cacti/succulents or, make your own using equal parts of both coarse sand and potting mix. The biggest thing to remember is, LOTS of drainage. Succulents will develop root rot very easy and they do not like constantly wet feet.


SENECIO SCAPOSUS

Most succulents need as much light as you can give them. The more they get, the happier they are. Let me give you a word of caution here. You may want to bring them in during the Winter, especially if you live somewhere that gets very cold. More on their cold tolerance in a minute. Even if you put them in the sunniest window you have in your house, they will not be getting as much sun as they do being outside. When you bring them back out the following Spring, be careful not to sunburn them.


SUNBURNED CACTUS

To avoid this, bring your plants out gradually. Place them under some taller plants or trees and move them out farther and farther into the full sun every couple of days.
I mentioned earlier that they are easy to grow, unless you have a heavy watering hand. I have literally gone weeks, almost months not watering some of my succulents. I don't suggest this, but it is nice to know that they will survive such harsh treatment. There is no hard and fast rule as to when they should be watered. There are many variables to consider, like, type of pot used. Clay will dry out faster than plastic. The type of soil medium used. If you use more sand, it will naturally dry out faster. Weather plays a big role. Lots of sun and heat will dry the soil out faster than if you have had a week of clouds and cooler temperatures. The bottom line is, the potting mixture should dry out between waterings.


LITHOPS SPP.

Succulents are much more cold tolerant than many people think. In the desert, where there is sometimes a large fluctuation between day and night time temperatures, succulents can live through cold nights. I am sure you have seen pictures of snow covered cacti. NO!!?? Okay, here was some of mine a couple of years ago.


I only lost one and it was not healthy before the storm anyway. In my greenhouse, it has dropped to 30 degrees with no ill effect on any of my other cactus or succulents.
They do like to be fed. If you feed your succulents every 4-6 weeks with your favorite liquid fertilizer, that will be plenty.
Other than the dreaded root rot from too much watering, succulents are pretty much problem free. The only real pests that they encounter will be the occasional Mealy Bug or Aphid. The best thing I have found to use on these is a strong spray of water. Oils and soaps can actually damage the plant more than the insect. You can also pick them off if the infestation is not too severe. If you must use a chemical, please follow the directions...It Is The Law! I would also suggest trying a small spot on an inconspicuous location on the plant and wait and see if it hurts it.


ECHEVERIA HYBRID

No matter what kind of succulent or cacti you're growing, the rules are pretty similar between the different species. They are all easy to grow and will give you years of happiness. I will admit, I had one other reason for writing about these cute little plants other than informing you how to grow them. It is called a little bit of bragging.
I mentioned my competitive side earlier. If you are as bad as I am, you might want to look into your local or state fair. There might just be a category for your little guys.....Like a small container grown plants category. At our local fair, this category was for small growing or classified as dwarf or miniature plants. I went one step farther and entered into the Collectors Showcase Award.
This was the one I won this year!


Happy Growing!
Darren

Sunday, October 30, 2011

Good Nutrition is for your Plants too!

Everyday we are bombarded by news reports and TV commercials stressing good nutrition. Eat right, stay away from fat and sugars, blah, blah, blah.
The past week or so I have been extremely busy as a Master Gardener. I have been working the Home and Garden Show, doing a lecture or two, and working our information booth out at the Coastal Carolina Fair. At every single event I got asked "What is wrong with my plant?"
I think we need to start having those nutrition commercials for plants also. It is absolutely amazing to me the amount of people that think they know how to grow plants, but have no idea that they need to be fed!
Okay, to be fair, I was asked by one nice lady....Why do I need to feed my plants? Nobody is feeding the plants in the forest.
I told her she was partially right. Mother Nature was feeding them. She had a very perplexed look on her face after that.
We have basically screwed with the natural order of things. In the forest, leaves drop off every Autumn. They fall to the ground and decompose. Nobody rakes them up into a nice neat pile and hauls them away. That is food for the plants for next year. Along with animal droppings, worm castings, other plants that die, and all kinds of other micro-organisms. That is how Mother Nature feeds her plants. In short, she has a HUGE compost bin. In our yards we clean, primp, rake, and remove all of that food. It is even worst in our container plants. THAT is why we must feed our plants. She walked away with a brand new look on feeding.
If you look at a bag of plant food, you will see three numbers. There are all kinds of combinations, I will use 5-1-3. The 5 is the amount of Nitrogen in this product.
Nitrogen is the primary component of proteins and is a part of every living cell. This nutrient is usually more responsible for increasing plant growth than any other nutrient, as long as it is used within reason and in conjunction with other nutrients. Shortages can cause slow growth, reduced leaf size, yellowing, short branches, premature Fall color and leaf drop, and increases the likelihood of some diseases. An over abundance can cause excessive shoot and foliage growth, reduced root growth, and increased susceptibility to environmental stresses and some other plant diseases.
This what a Nitrogen deficiency can look like:


Notice the yellow leaves compared to everything around it? This is a Citrus tree that some how or another kept getting missed when it came to feeding time. Everything else around it looks fine. Nitrogen is a nutrient that moves very freely through the soil and is literally washed out every time you water or it rains, especially in a container such as this one. Even in the ground, Nitrogen can be depleted and needs to be replaced.
The second number (1 in my example) is Phosphorus. This nutrient plays a role in photosynthesis, respiration, energy storage and transfer, cell division, and cell enlargement.
Though less common than Nitrogen deficiency, Phosphorus shortages can look like this:


Purple veins may appear on the leaves or the leaves may take on a purplish color. It will also produce stunted growth and small thin stems. Like I mentioned, it is much less common a problem. If you have ever applied any fertilizer, the chances are good that the Phosphorus is still there. It does not move through the soil hardly at all.
The third number, (3 in my example) is Potassium. I should pause here a second and give you a tiny memory trick. Do you have trouble trying to figure out what order the numbers are in on the bag? As long as you can remember the three nutrients, Nitrogen, Phosphorus and Potassium are the three numbers listed on a fertilizer bag, it is always listed in alphabetical order.
Now, back to Potassium deficiency. It too is involved in many of the plants growth processes. It is also vital to photosynthesis and helps regulate water in plants. Potassium fertilization helps plants overcome drought stress, increases disease resistance, and improves Winter hardiness.
It can look like this:


Typical symptoms of Potassium deficiency in plants include brown scorching and curling of leaf tips. The symptoms generally first appear on older leaves. Potassium can move through the soil fairly quickly, faster than Phosphorus, but not as fast as Nitrogen.
That is a very quick idea of what are called the Macro-Nutrients. These are what a plant needs the most of.
There is also a list of Micro-Nutrients. These are needed by the plant, but in much lesser amounts.
This list includes:
Boron. Believed to be involved in carbohydrate transport in plants; it also assists in metabolic regulation. Boron deficiency will often result in bud dieback.
Chlorine. Necessary for osmosis and ionic balance; it also plays a role in photosynthesis.
Copper. A component of some enzymes and of vitamin A. Symptoms of copper deficiency include browning of leaf tips and chlorosis (leaf yellowing).
Iron. Essential for chlorophyll synthesis, which is often why an iron deficiency also results in chlorosis.
Manganese. Activates some important enzymes involved in chlorophyll formation. Manganese deficient plants can develop chlorosis between the veins of its leaves. The availability of manganese is partially dependent on soil pH.
Molybdenum. Essential to plant health. Molybdenum is used by plants to reduce nitrates into usable forms. Some plants use it for nitrogen fixation, thus it may need to be added to some soils before seeding legumes (Beans and Peas).
Zinc. This also participates in chlorophyll formation, and activates many enzymes. Symptoms of zinc deficiency include chlorosis and stunted growth.
So, as you can see, many nutrients rely on each other, or deficiencies can mimic each other.
There is not much need to worry about the Micro-nutrients, most good fertilizers already have them.
Which brings me to my next point. Types of fertilizers.
You should ALWAYS get your soil tested by your local extension office before applying any fertilizer. It could actually save you some money, time, and headaches in the end.
With that being said, the shear number of fertilizers on the market can be overwhelming! There are granules, water soluable, slow release, quick release, natural, and on and on. In a way I can see why people don't feed their plants, they have no idea what to use!!
Let me break down a few of the more common ones.
Slow release fertilizer. It is exactly what it sounds like. They release nutrients at a rate that makes them available to plants over a long period. They are applied less often and many believe they are better for the environment because they have less chance of leaching into the water supply. While I am on this topic, please do not use fertilizer spikes. If you want the whole story as to why not, I can give it to you. Suffice to say, they are just bad news.
Water Soluable. Again, exactly what it sounds like. This fertilizer is mixed with water at a specified rate. This type of fertilizer needs to be applied more often, but it is available to the plant much more quickly.
Natural Fertilizers. When it comes to the naturals, there is often a lot of quess work involved. Most natural materials are far less predictable in nutrient content, nutrient release, and nutrient efficiency than commercial grade fertilizers. Before most natural fertilizers can be absorbed by plants, they have to be broken down to an inorganic form by soil microorganisms through a decaying process called mineralization. This process is affected by moisture, temperature, and the microbial species and populations in the soil. Some examples of Natural fertilizers include, Blood Meal, Sewer Sludge, Animal Manures, Fish Emulsion and Cottonseed Meal.
The advantages and disadvantages of natural and synthetic fertilizers relate to the consumer, not to the plant. Use what you feel comfortable with, or have had success with.
This whole article just barely scratches the surface of fertilizers. I did not even get into the effect soil pH has on fertilizers. Or "when" to fertilize the plant if it is in the ground or in a container, especially if you will be protecting the containerized plants over the Winter or anything else like that. If you have a specific question in that regard, please feel free to contact me.....TheCitrusGuy@netzero.com.
There is so much information out there and new studies are being done almost on a weekly schedule. I wanted to bring your attention to the fact that plants DO need to be fed, whether it be naturally or artificially.
I will leave you with this story, completely true!
A woman came to me with a Citrus problem. She had a Meyer Lemon that she bought two years ago. It was a nice little tree already bearing fruit. She was growing it in a pot. When she came to me, the tree had not produced any fruit the prior year and was turning yellow. After a few questions I found out she did not know it needed to be fed, and had not given it anything to eat in the two years she had owned it!! I asked her how she would feel if she had not eaten in two years!?
Please remember to feed your plants!!
Happy Growing!
Darren

Sunday, October 16, 2011

A Good, Bad Bug?

I was alerted to today's topic by one of my followers,
(Thank You Alicia..a.k.a. lpyrbby )
I figured this was a problem that is starting to reach many parts of the Southeast, so I might want to get a handle on it. This is one of those situations, are you a good bug or a bad bug? Think Wizard of Oz here.
It's scientific name is Megacopta cribraria. It is better known as Bean Plataspid, Lablab Bug, Globular Stink Bug, or Kudzu Bug. It is pea-sized and brownish with a wide back end, kind of like a boxy ladybug.


It was first discovered, I use discovered because it had not been found anywhere on this continent, until Halloween weekend 2009 in Northeast Georgia. Gives a whole new meaning to "Trick or Treat" doesn't it? Let me give you the evidence for good versus bad.
I will start here. The Kudzu Bug eats, what else? Kudzu.
Kudzu is itself an invasive plant. Some of its nicknames include, "Mile a Minute Plant" and "The Vine that Ate the South".


Photo courtesy of Insectsinthecity

The Kudzu plant was introduced to the United States in 1876 at the Centennial Exposition in Philadelphia, then was introduced into the Southeastern United States in 1883 at the New Orleans Exposition. The vine was widely marketed as an ornamental plant to be used to shade porches. In the first half of the 20th century, Kudzu was distributed as a high protein cattle fodder. It was also used as a cover plant to help prevent soil erosion. The Soil Erosion Service recommended its use to control the erosion of slopes, which led to the government aided distribution of 85 million seedlings and government funded plantings. Since then it has been spreading in the Southern U.S. at the rate of 150,000 acres annually. Its quick growth wreaks havoc on the ecosystem, it smothers and strangles other plants, uproots trees and breaks branches with its weight. It tops the nation's invasive species list.
Now, along comes the Kudzu Bug. Its favorite delicacy, Kudzu. The good news here is, it may slow down the spread of this rapidly growing vine, though not significantly. Any help is greatly appreciated.
Sounds like all good news huh?
Well, hold on a second. Did I mention this thing is a type of stinkbug? The smell has been described as "not an awful smell, more of a bittersweet, pungent, unpleasant odor". Some people have reported being able to smell the stench from their cars while crews are cutting Kudzu overgrowth along highways.
Okay fine, get a heavy duty air freshener for your car.
Well, there is more. As Fall approaches and the Kudzu begins to lose its leaves, the bug needs somewhere to go. Apparently they have been seen congregating on light colored surfaces, especially the white parts of houses.


They can invade your attic or crawl space, looking for a place to hunker down for the Winter. A basic insecticide for household pests will temporarily control them around your home, but the best defense is to have good screening up on all of your openings. You will want to gently remove these guys from your home, should they get inside. Squishing them will leave a stain and stink up the joint. Use a vacuum to suck them up, then remove the bag immediately to an outside trash can or place the bugs in a container of soapy water.
Have you decided yet? Good Bug or Bad Bug?
It may help alleviate our Kudzu problem here in the Southeast. The bug can now be found in 143 Georgia counties, all South Carolina counties, 42 North Carolina counties and 5 Alabama counties. As long as we have a good air freshener and some bug spray, we can kind of control him and his stench.
HOWEVER, you knew there was one more caveat didn't you?
The folks in the agriculture world are a little nervous. See, this thing has an appetite for more than just Kudzu. Apparently, it has discovered it likes Wisteria, which again may not be a bad thing here in the South, but also Soybeans, Green Beans and it possibly could be heading for a famous legume, Peanuts. There is also concern that its tastes could broaden even wider. There is no known natural enemy to the Kudzu Bug here in the United States.
How the bug got here remains a mystery. So you decide, Good Bug or Bad Bug? Either way, this is one wicked "Trick or Treat" bestowed upon the United States!
Happy Growing!
Darren

Sunday, October 9, 2011

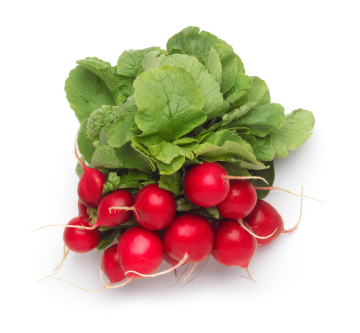
A Rash of Radishes

Here in the South, we are lucky enough to have almost a 365 day growing season. The cool season crops are just going in. As I was talking to my mother the other day, we were comparing what we had planted so far and what we were planning on planting.
The topic of radishes came up. The California Rare Fruit Growers Association has made this the year of the Pomegranate, I disagree, I think it should be the year of the radish. Apparently my brother has decided to plant LOTS of them and as far as I know, the consumption of radishes in my family is not exactly brisk. Though, for some apparent reason, I even planted some this year. A radish conspiracy?
I had the seeds, so why not?
The radish, Raphanus sativus, is thought to have originated in East Asia or more than likely China, but the exact location is unknown. Egyptian writing reports that radishes were a common food in ancient Egypt before the pyramids were built. In Greece, radishes were so highly valued that imitations of them were made of gold. The radish did not make its way to England until approximately 1548. By 1629 they were being cultivated in Massachusetts.
The earliest radishes to be cultivated were the black varieties.


This variety is turnip-like in size and shape, approximately eight
inches long. Black radishes have a dull black or dark brown skin. When
peeled, their flesh is white, quite pungent, and drier than their other color counterparts.
Black radishes have a longer shelf-life than most other varieties, so they are
available year-round.
Red Globe is the radish most people know. It is the most popular variety in the United States. This is the familiar looking red and white "button".


One other radish I would like to mention is the Daikons. They are very large, carrot-shaped radishes that are up to 18 inches long and weigh one to two pounds. Daikons have a white flesh that is juicy and a bit hotter than a red radish, but milder than black.


I mentioned that here in the South we have an almost year round growing season. Radishes are considered a cool season crop, preferring temperatures between 40-70 degrees. Optimum temperature range is 60-65 degrees. The nice thing about radishes is, they are a very quick crop to turn around from seed to table. Most requiring only 20-35 days to mature. Even some of my friends up North may still have time to plant some. If nothing else, they work great in a container and can be brought into a garage if the temperature starts to go below freezing. There are some varieties that require 40-50 days.
Because radishes grow so rapidly, a rich, fertile soil is essential. Sandy or sandy-loam soils are preferred. The soil should be free of stones, clods, lumps, and undecayed organic matter. To be mild, tender, and attractive, the radishes must be grown rapidly. Slow growth or checked growth results in roots that are tough, woody, pithy, and pungent. The "hotness" of radishes results from the length of time they have grown rather than from their size.
To plant, sow seeds one quarter to a half inch deep in rows spaced 3 inches apart. After the seedlings appear, you will want to thin them out so they have room to grow. Usually you will want about 2-3 inches apart on all side. Seeds typically sprout in three to seven days when sown in 60 degree soil.
Keep an even moisture level. Sometimes radishes simply split open as they mature and get older, this is the result of uneven watering. Trying to make up for a period of drought with a lot of water all at once will cause the radish to grow too rapidly and split open.
Diseases are not usually a problem when growing radishes, probably due to their quick growth. There are a few pests that you may need to look out for. Flea beetles make numerous small holes in radish leaves.


Flea Beetle

Cabbage root maggots and cutworms sometimes rasp holes or channels into radish skins. Aphids and various caterpillars, such as cabbage loopers and diamondback moths will also eat the leaves. All of these pests are easily prevented by covering the plants with lightweight floating rowcovers.
There are many, many different named radishes on the market, it might take a little research to uncover many of them. Some to look for include: Cherry Belle, Easter Egg, Round Black Spanish,Icicle and the unusual sounding French Breakfast.
Radishes are most often eaten raw. Use a stiff vegetable brush and scrub them under cold running water. Do not peel radishes, unless there is some kind of problem with the skin. Pare away the top and root end then slice, dice, shred, or serve whole.
I have discovered some other interesting ways to eat and use these tasty little treats.
In China and Japan, most of the radish crop is pickled in brine, in much the same way that we pickle cucumbers.
How about an Open-Faced Radish Sandwich

4 bagels cut in half or 8 slices bread
8 ounces cream cheese
6 small globe radishes
salt and pepper

1. Spread bagels or bread slices with 1/4 inch cream cheese.
2. Using s sharp knife or mandolin, slice radishes very thin. Overlap the radish slices on top of the cream cheese. Sprinkle each sandwich with salt and pepper.
Maybe my brother has already seen these recipes and that is why he planted so many. If any of these recipes pan out to be good, maybe I will be planting a Rash Of Radishes myself!
Happy Growing!
Darren