Sunday, March 6, 2011

Why So Blue, Berry

I have been meaning to do a blog on Blueberries for quite some time. They are fairly easy to grow, if you have the right soil. They are good for so many things, pies, jams, syrup. They are full of antioxidants, for those of you that know me, this one probably does not really fall onto my radar. And of course, they are just down right tasty eaten right off the bush. There is one more good reason why I needed to write about Blueberries, I found out this past weekend that my little niece (almost two) can not get enough Blueberries to eat......for her to shovel them into her mouth is probably an understatement. So Sarah, when you are old enough to read this, probably next year at the rate she is going, you can grow all the blueberries your little heart desires!


There are three main types of cultivated blueberries that can be grown, Rabbiteye, Northern Highbush and Southern Highbush. Here in South Carolina, Rabbiteye and Southern Highbush are the recommended varieties. The Northern Highbush is more suited for major areas of production in the upper South(Arkansas), Northeast, Midwest and Pacific Northwest.
The Southern Highbush Blueberry is a relatively new type of Blueberry and is a hybrid of the Northern Highbush and native Southern species, mainly Darrow's evergreen Blueberry.
Depending on where you live will determine which is the best for you to grow. Check with your local extension agent to find out.

Here in the Lowcountry, the best varieties are:

Early season cultivars:

Climax: Plants require 450 chilling hours. This cultivar has a concentrated fruit set with small to medium sized fruit. Recommended cross-pollination with Premier or Austin.
Vernon: PP19291. Requires 450 hours of chilling. Flowers 7 days after Climax, but ripens before Premier. Fruit are large, firmness is excellent, and have good flavor and color. Recommended cross-pollination with Alapaha.
Alapaha: PP16266. Requires 450 to 500 chilling hours. This cultivar has a medium-size fruit with good firmness and flavor. Flowers 7 to 10 days after Climax, which helps avoid spring freeze damage to flowers. Recommended cross-pollination with Vernon.
Austin: Plants require 500 chilling hours. Plants are productive and produce medium-large berries. Recommended cross-pollination with Climax or Premier.
Premier: Requires 550 chilling hours. Plants produce medium to large sized fruit. Recommended cross-pollination with Austin or Alapaha.

Midseason cultivars:

Brightwell: Requires 400 chilling hours. Fruits are medium to large in size but may split during wet weather. Recommended cross-pollination with Austin or Premier.
Powderblue: Plants require 600 chilling hours. Plants have good production of medium-sized, light blue fruit. Recommended cross-pollination with Tifblue or Brightwell.
Tifblue: Requires 650 chilling hours. Plants produce small to medium size fruit, which must get fully ripe or they will be tart.

Late season cultivars:

Baldwin: This late maturing cultivar requires 450 to 500 chilling hours. The plants have moderate yield and high vigor. The fruit are large, of good quality and very dark blue color. Cross-pollinate with Brightwell, Powderblue, and Centurian.
Centurian: Centurian plants need 550 to 600 chilling hours for fruiting. The fruit is very good quality, medium-sized, firm, and darkish-blue. The fruit may crack with heavy rainfall. Pollinate with Brightwell, Ochlockonee, and Powderblue.
Ochlockonee: PP17300. Requires 650 to 700 chilling hours. This cultivar is very productive with fruit larger than Tifblue. The fruit has good color, firmness, and flavor. Recommended cross-pollination with Powderblue.
Onslow: This cultivar has fruit slightly larger and darker than Powderblue. For fruiting, the plants require 500 to 600 chilling hours. The plants are productive and vigorous. It has been reported that Onslow may tolerate soils of a higher pH than other cultivars. The fruit is large, with very good firmness and a medium blue color.

However, for the most part, they all require the same general cultivation, just watch your chill hours.
To start, this is a great time to stress one of the Master Gardeners all time mantras...Have your soil tested! Especially if you are going to plant Blueberries.
They must have a very acidic soil, with a pH of 4.8 to 5.5. To give you a point of reference, 7.0 is considered neutral. The soil pH scale commonly in use ranges from 0 to 14. As examples of either end, Lemon Juice and Vinegar are on the acid side, Baking soda and Milk of Magnesia is on the alkaline side. I won't get into the really technical data here, just remember, that Blueberries like it on the acidic side. If you have any doubts about your soil, you can always add a heap of peat moss and mix it into your backfill.
Blueberry plants require excellent soil drainage. Not sure if your spot has good drainage? Here is an easy little trick. Dig a hole or holes, 6 to 8 inches deep and fill them with water. The water should not remain in the hole for more than 24 hrs, if it does, select another site or plant them on raised beds. Just as a side note, Blueberries can be grown in large containers, this is a VERY easy way to control the soil pH. After creating the raised beds, check for drainage again. With this type of planting, you are still going to need to water thoroughly two to three times per week during dry spells in the Summer and early Fall. The soil should be moist to damp at all times, just not wet...that is an invitation to root rot.
Full sun is best. This is usually anywhere from 8-10 hours, or more. Blueberries can be grown in areas that do not receive this much light, but the harvest will suffer dramatically.
When it comes to feeding your Blueberries, they are easily damaged by excess fertilizer. Apply the recommended amount from your soil test report and allow 4 inches of rain or an equivalent amount of irrigation between applications. A balanced fertilizer of 10-10-10 or something labeled for acidic plants is best.
Blueberries are produced from buds on 1-year-old wood, pruning should be severe enough to encourage the production of vigorous new growth each year. With this being said, however, during the first five years, little pruning will be required. You will want to remove the lower twiggy growth, dead or damaged shoots, and weak, spindly growth during this time.
With good care, mature plants should produce more than 10 lbs each year. That much fruit production is a good thing because you will have competition for the berries. Birds love Blueberries too. They can consume the entire crop from a small planting. Plastic or cloth netting draped over the bushes or supported on a framework, while the fruit is ripening, is the only practical control. Please don't use the old CD or pie plate on strings as a deterrent, they only laugh at those. And scarecrows? They usually end up being given pet names by the birds and then mocked. Netting really is the only good deterrent.
Something else to consider is mulching. This is the best form of weed control.
Blueberries may also be troubled by fungal leaf spots, fruit rots, root rot and gray mold. The primary insect problems are cranberry fruitworm (which ties the berry clusters together with silk), Japanese beetles and the Oberea stem borer.
Fungicides labeled for Blueberries will take care of the fungal problems, and insecticidal soaps or insecticides labeled for Blueberries will handle the bugs. ALWAYS read the label, I have said it before and I will say it again, IT IS THE LAW!
You will get the best quality of fruit when it is picked every 5 to 7 days, depending upon temperature, the warmer the temps, the more often you need to pick.
This has been a very brief description of growing Blueberries. I hope I have spurred you on to read more about these tasty treats. I have only touched the tip of the iceberg. If you have any questions or would like more in-depth information, please feel free to e-mail me, TheCitrusGuy@netzero.com.
As for my niece, Sarah, I hope to have a little surprise for her in a couple of years. Yes, she loves her Blueberries and as a loving uncle, I want to give her all she wants. What she doesn't know is, I have a variety that I am growing that, while they are called Blueberries, and they are supposed to taste like them, they sure don't LOOK like them. Introducing, Pink Lemonade Blueberries.


Look for them online or at a good nursery near you.
Feel free to ask me questions about this, or any of my other articles, e-mail is TheCitrusGuy@netzero.com
I can be found on my WEBSITE or FACEBOOK as The Citrus Guy.
Happy Growing!
Darren

Saturday, February 19, 2011

Having to Contain Myself

I did a lecture this past week for a local civic organization. They are wanting to bring back the old victory gardens. I am not old enough to remember them, but I have read about them. Preparedness was the overall theme for the evening. I asked them, and they were very receptive, to me adding a little twist on all of this.....Growing everything in containers.
Why grow everything in containers?
Let me give you a few reasons:
1) You have a small space or no yard. Even people that live in apartments and have a balcony can grow a tomato plant and some herbs.
2) You rent. This is one of my big reasons. I rent and if I want to take my plants with me in the case of wanting or having to move, they can be picked up and thrown in a truck. My lease, as I suspect many others, states that anything planted in the ground must stay in the event of moving.
3) You get bored with the way your yard looks. I know many people that like to re-arrange their living room furniture often. My brother comes to mind. If you are the same with your yard, growing everything in containers makes that a whole lot easier to accomplish.
4) Lengthen your growing season. Even in my Zone 8, Winter is a fact of life. I enjoy seeing things grow, but in 28 degree weather, there is not much of that going on. I can pick up my containers and put them in my greenhouse or if you don't have one of those, a garage, unused bedroom or any place else that can stay warm and well lit. Even if you have to use grow lights.
This can also give you a jump start on the other end of the season. The soil in containers warms up faster than the ground. Seeds and plants grow faster in warmer soil.
What can you use for a plant container?
The easiest answer is, Anything that can hold soil and has good drainage.
It needs to be big enough to house the mature plant. It also needs to be strong enough, or made of something, that will last at least a full season of growing. Cardboard boxes do NOT make a good plant container.
Here is a good example of what I am talking about.

It might be a little difficult to see, but behind the containers of Onion and Garlic is an old bathtub. Yes, you read that right, a bathtub. It actually has Asparagus growing in it. We had our bathtub replaced and instead of throwing it away, instant plant container. It has everything a good container needs, it holds soil, will not fall apart in a single growing season, will hold the mature plant and has drainage. I have toyed with using a toilet for something right next to it, but haven't gotten that far yet.
I have seen old crates used, pickle buckets, laundry hampers, giant tires, just use your imagination and remember the keys, drainage, soil holding, stability and size.
I even found this online:
This could definitely be a conversation starter. Please insert your own jokes here.
There is also the conventional horticulture trade size plastic containers. Here is a little hint as to where you can get some of these, possibly for free. The next time you see a landscaping crew working in your neighborhood, stop and ask them if they have any containers they are wanting to get rid of. Many times they will point to a pile and tell you take what you want, they don't want to haul them back to their shop. What is the worst they can say, "No".
What can be grown in containers?
Again, easy answer: Pretty much anything!
CORN

TOMATOES AND PEPPERS

CITRUS (I AM the Citrus Guy after all!)

If you are saying, what about vines and climbing plants?
RASPBERRIES, BLACKBERRIES, BOYSENBERRIES

Trellis' also are used for things like Cucumbers and such.
If you like it, more than likely it can be grown in a container. Sometimes a very LARGE container might be needed, I don't think a 100 foot Coconut palm will do very well in a pot, but hey, I am always willing to try anything.
How to get started?
I will assume you have secured some kind of container, and have decided what you want to grow by now. What kind of soil should you use?
This is definitely a personal choice. There are many, many different kinds of potting mixes available on the market these days. Each one being better suited for one thing than another.
If you want to make your own, here is a simple recipe. This is not rocket science, nor are you baking a cake, these ingredients can be mixed and matched to suit your taste.
2 parts compost
2-4 parts peat
1 part each sand, vermiculite, or perlite
Most of these can be found at any of the big box stores or local nurseries.
Feed me and I will feed you!
Fertilizers are a little trickier in a container than they are for in ground growing plants.
Nitrogen, the first number on any fertilizer package, is probably the most used by your plant. It is also the one that leaches out of the soil the fastest. Every time you water, Nitrogen is leaching out of the soil. There are a number of ways to counteract this problem. Water soluable, i.e. Miracle Grow, should be used on all your annual plants. Things like tomatoes, herbs, carrots, etc. The reason is, a slow release fertilizer, like Osmacote, does not break down fast enough for the plants to use it. The slow release is fine for Citrus, Blueberries and any other perennial plant, but not for the annuals. You can either apply the water soluable every 3-4 weeks or use a 1/4 strength solution every time you water.
Points to keep in mind.
There are a couple of other things that you should keep in mind when growing plants in containers. Plants in pots will dry out much faster than their in ground counter parts. When the soil is dry up to your first knuckle, it is probably time to water. Make sure it is a good, deep watering. You want to see water coming out of the drainage holes. Make sure the soil is being saturated and NOT just running down between the soil and the container side.
The root zone can also get very hot in the Summer time. It is not uncommon for the temperature to reach 120 degrees around the roots. To alleviate this, either paint the pot white using a paint for plastic, or, plant other plants around the base of the container.
This may not be the way our parents or grandparents had their Victory Gardens, but I find it much easier to be in control this way. Soil, water, placement, and lots of soil borne illnesses can be controlled and fixed much faster than if everything was planted in the ground. I will leave you with one last picture of some of MY container Victory Garden. This is two kinds of Okra, some Beans and the corn you saw earlier.

Happy Growing!
Darren

Saturday, February 12, 2011

Don't Pick on the Pear!

I often have conversations with many of my fellow Master Gardeners and other gardeners about planting native species, or don't plant this or that, due to certain conditions. One of the big ones I get fussed at is my defense of the poor Bradford Pear. I know they have their problems, but I think they are also getting a bad rap.
Bradford Pears are a variety of a pear native to Korea and China, Pyrus calleryana, which was first introduced to Western horticulture in 1908. The actual cultivar 'Bradford' dates back to 1963, when the USDA introduced it commercially. It was first brought here in 1919.
The tree was supposed to be the perfect street tree, with profuse early bloom, a restricted pyramidal shape, and good fall color.
If you have never seen them in bloom, look at this:
Pretty nice huh?
I will admit, there is some objection to the odor all those flowers put out, but I don't find it that bad.
Fall Color? Check this out:

Many landscapers, and homeowners agreed with this thinking and today it can be found almost everywhere.

So why then do so many people have a problem with this tree?
A combination of plant physiology and physics makes the Bradford very susceptible to wind and ice damage. The angle of the Bradford's branches is generally too narrow, and as the tightly-crowded branches grow in girth, the tree begins to push itself apart. At the first strong wind or heavy ice storm, the tree self-destructs.
Average lifespan is about 20-25 years.
Fully grown the Bradford Pear grows 30 to 50 feet tall and 20 to 30 feet wide. It is a very fast grower, averaging 1.5 feet per year. This is part of the problem with it having weak wood. They grow best in full sun but will tolerate part shade. It can handle all kinds of soil types and will tolerate drought and very wet conditions for a short period of time.
Bradford Pear is fairly resistant, although not immune, to most diseases, including fire blight. Fire blight is a common problem of ornamental and edible pears. This is where the ends of twigs and leaves become blackened as the disease progresses further down the branches. The Bradford pear is relatively free of insect problems.
One reason I have these discussions and get fussed at with people is because Pyrus calleryana and other varieties of ornamental pears are on the Invasive Plant Pest Species of South Carolina list. Although the ‘Bradford’ pear was originally bred as sterile and thorn-less, they readily cross-pollinate with other varieties of callery pears, and subsequently produce fruit. The ripened fruit are eaten and spread around by birds, which supposedly results in very thorny thickets of wild pear trees. I personally have not seen these thickets.
Yes, they do produce fruit:

And the birds do love them! Check out this Cardinal enjoying lunch in one of my trees:

They also love to nest in them. A female Dove made her home in mine this past April:

Aren't we suppose to help our fellow creatures? That is always my argument. You feed birds sunflower seeds, those things pop up EVERYWHERE, but nobody argues about that! I know, they are annuals and will die in the Winter, unless they go to seed?!
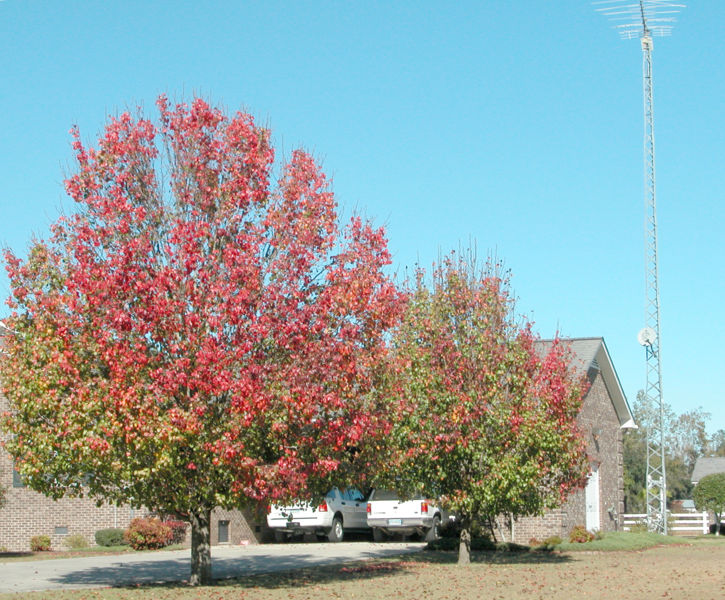
Back to the Bradfords. I have seen old ones and they look great! One of the keys is to pick one out with a strong central trunk, kind of like these:
These are my trees also.
I am sure I will get arguments opposed to my blog. There are many more trees out there that can and will give you the same effect. Yes, there are. There is also many more ways to feed the birds and yet people insist on feeding them millet. THAT stuff is invasive and messy! So to each their own.
I will give you a few substitutes however. Flowering Crab Apples (Malus spp.) and Japanese Cherries,(Prunus serrulata) such as 'Kwanzan', are good alternatives. For smaller trees, Dogwoods (Cornus florida) and Redbuds (Cercis canadensis) are excellent.
As for me, the Bradford Pears I planted are now large, provide much needed shade, food for the birds, and places for me to put many of my hanging potted plants. So, they are staying!
Happy Growing!
Darren

Monday, February 7, 2011

Winter vs. Summer

No, this is not going to be a Battle Royale between the seasons, besides, Summer would win hands down anyway. Nope, with planting season just around the corner, I am starting to get some rather interesting questions.
The other day I got asked about the planting times for Squash. I sent them a link that explained when and all that kind of stuff. They then came back and asked why Summer Squash and Winter Squash have the same planting dates, that being March here in Zone 8, what is the difference between the two?
I thought this was a GREAT question! What really got me to thinking about it was, this came from a good friend of mine who knows A LOT about gardening. If he was wondering, I am sure there are plenty of others.
Squash is native to North and South America and many of the types are believed to have originated in Mexico and Central America where they were eaten 7,500 years ago. American Indians shared many varieties of squash with the European settlers, who took the seeds back to their countries. Today, squash and pumpkins are grown all over the world, and are wildly popular in many Eastern European countries.
Both Summer squash and Winter squash are fruits of vines that belong to the cucumber family (Cucurbitacaea). These plants include cucumbers, melons, and gourds. Squashes are members of the gourd group.
The difference between Summer and Winter is actually very easy. Summer squashes are those types eaten when the fruit is immature and the skin tender. Winter squashes are those types which are allowed to mature before being harvested.
Lets start with Winter Squash. Only because I am tired of Winter and want it to be gone. Ha-Ha.
Some varieties Winter Squash

Winter squash typically need a long growing season, as most take 70 to 120 days from planting to harvest. Winter squash and pumpkins can be planted either in late Spring or in midsummer. Pumpkins (usually grouped with Winter Squash) which are being used for ornamental use should be planted in mid to late Summer depending on the time needed for the variety selected. Some of the more common types of Winter squash are: Acorn, Butternut, Buttercup, and Spaghetti.
Winter squash will keep from two to six months or more depending on the variety and storage conditions. They are usually stored over the Winter months, hence their name. Mature Winter squash have very hard skins that cannot be punctured with your thumbnail. They typically have very hard seeds also. In addition, the fresh, bright, juvenile surface sheen will change to a dull, dry-appearing surface. Being that they have such hard shells,the skin of Winter squash is inedible. It must be peeled before cooking/eating, or the flesh should be scooped out of it after cooking.
Many people will tell you there is only one way to prepare Winter Squash, and that is to cut it up into chunks or slices and cook. There really are two easier ways to cook Winter squashes of any size. The fast way is to prick a squash with a sharp knife, place it in a microwave and allow it to cook on high for at least ten minutes. Many will require more time, depending on size of squash and power of your microwave. You’ll have to keep checking until the squash is soft and pliable. This will steam the squash. Cut it in half, discard the seeds and scoop out the interior. Now it’s ready for freezing, turning it into a casserole, pie,or mixing with mashed potatoes.
The other way is in the oven, Prick the skin and roast at 350 degrees for about one hour.

Some varieties of Summer Squash

Summer squash grows quickly and can be harvested about 55 days after planting. They are generally divided into four groups, crookneck, zucchini (green and yellow), straightneck, and scallop (pattypan). They have thin, edible skins and soft seeds. The seeds can be scooped out or left in. The Summer squash will spoil rapidly after picking and you should cook it and eat it as soon as possible. Because of their high water content, they do best when cooked with dry-heat methods such as stir frying, grilling or sauteing to avoid turning them into mush, unless you like that. Of course, cooking by steaming, simmering in a sauce, baking or deep-frying are also fine.
Having them grow in your garden is relatively easy.
All types of squash and pumpkins are highly susceptible to frost and should be planted in the garden after all danger of frost is over. Squash seeds do not germinate well in cold soil. Plant squash in full sun. They can be planted in rows spaced 3 feet apart or they can also be planted in hills. Rows should be spaced 4 to 6 feet apart, with hills 3 to 4 feet apart within the row. Place two or three seeds in each hill.
Watering should be done to provide uniform moisture, extremes between wet and dry will affect your crop. Water sufficiently to moisten the soil to a depth of 6 inches. Light sprinklings will encourage shallow rooting of the plants. The critical period for moisture is during fruit set and fruit development.
A problem with Summer squash is the rotting of the blossom end of the fruit, called blossom-end rot. The main symptom is a dark-colored dry rot of the blossom end of the fruit. Blossom-end rot is caused by a lack of calcium in the developing fruit. It may be an indication that calcium is lacking in the soil or that the plant does not have the ability to take up adequate amounts of calcium from the soil.
The most common diseases of squash and pumpkins are bacterial wilt (spread by cucumber beetles), powdery mildew, downy mildew, fruit rot, and anthracnose. Powdery mildew can be a particular problem on late-planted squash. It is the most common and damaging disease of pumpkins.
Insect problems include spotted cucumber beetles, striped cucumber beetles, pickleworms, squash vine borers, aphids and squash bugs. Aphids are a major problem because they can also transmit viruses to the plants. Squash vine borers can cause total collapse of the plant. Plant early because squash vine borers and pickleworms are problems later in the season.
Please, don't let these diseases and pests deter you from growing Squash. If you want another reason to grow them. One of my mothers favorite foods does not even come from the squash itself. She likes the flowers.


The blossoms from Summer and Winter squash are edible. Choose blossoms that have closed buds. They will be somewhat limp, but this is normal. Store them, refrigerated, for no more than one day. They can be eaten raw as garnish, in salads, battered and fried or stuffed and baked.
Ricotta Stuffed Blossoms

Fried

I know what some of you are saying, I would LOVE to grow some Squash, but I can't. I have limited space. I have the answer for you! There are some varieties that have a bush-type of growth instead of the vining habit, which is useful if your garden is small. Some of these varieties that you can look for include: Gold Bar (a yellow zucchini), Starburst (a yellow patty-pan), Bush Crookneck, Bushkin Pumpkin and Burpee's Bush Table Queen, just to name a few. Make sure you look in your seed catalog, they should tell you whether they are bush or vining.
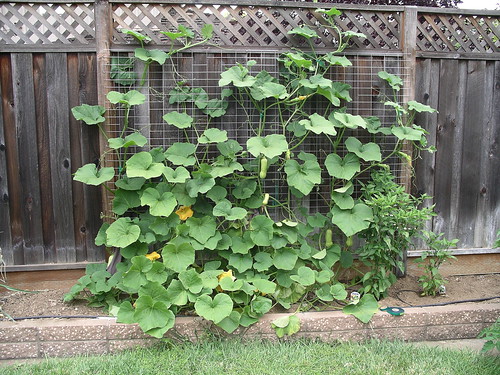
One last suggestion would be to grow them on a trellis.

Well, I hope this has given you some inspiration to try something new this year in your garden or to revisit an old friend that you haven't grown in years. I also hope that I have explained the difference between Summer and Winter squashes so when you get put on Jeopardy, you will can win it all! I'll bet Alex Trebek can't tell you the difference!?
Happy Growing!
Darren

Saturday, January 29, 2011

Cut out the Cutting!

Do you have something that looks like this in your yard?

Then CUT OUT THE CUTTING!!
You are going to be accused of committing Crape-acide!
Lagerstroemia indica or Crape Myrtle is so named because of its flower petals that resemble crepe paper. This large shrub or small tree was introduced to Europe from China and India in 1759 and made its way to the America’s in the late 18th century. While it is commonly called a Myrtle, it is not a true member of the Myrtle family. Cultivars now range in size from dwarfs (about 10 feet) that can be grown in containers, to the full size ones that can grow to heights of 25 to 30 feet with a spread of 15 to 25 feet. Usually it is sold as a multi-stemmed trunk, but it can be trained as a single stem.
I mentioned the flowers resembling Crape (or Crepe) paper.

The flower colors differ greatly depending on variety, but the common colors are lavender, pink, purple, red, and white. They are also very long lasting, often called the "plant of the 100 day bloom". Many people also enjoy they exfoliating bark.
Crape Myrtles are low-maintenance and easy to grow if provided with sunny locations and soil with moderate moisture and fertility. They are very drought tolerant however, once they are established. This is one reason why they have gotten such a toe hold on the landscape of the South.
Choosing the right Crape Myrtle for your landscape requires evaluating where it will be planted, not just what color its flowers are. The smaller the space available, the smaller the Crape Myrtle (at maturity) should be, so be sure to choose a cultivar that will not require pruning to make it "fit" into the landscape.
Which brings me to the main topic of today's blog, pruning. Do you or someone you know do this to a Crape Myrtle?:
The practice of chopping off the tops of Crape Myrtle has become very commonplace. Many people believe that it is required to promote flowering; others prune because the plant is too large for the space provided.
One of the reasons that they are pruned in Winter is to get more flowers in Summer. Crape Myrtles produce flowers on new wood, so the idea is that the more you cut, the more new growth and flowers you'll get. This is actually semi wrong. The first thing it will do is actually reduce the amount of the blooms that will appear. Secondly, if the branches are cut back too far, it will cause the new branches to grow much too long and they will not be able to support the weight of the heavy blooms, especially during any kind of strong winds or after a nice heavy Spring rain. It will cause the branches to sag and many times they will break or snap. If this is not bad enough, research has shown that stem decay significantly increases when topping cuts are made, and that more dead branches also occur within the canopy. Just one more thing to think about, plants stressed by severe pruning are more prone to pests and diseases.
Why does this happen then? Many people see their neighbors doing it and feel the need to follow suit. If Joe down the street is doing it, then it must be the thing to do. I guess I should do it too. Another reason is topping these trees way back is easier and quicker than pruning them carefully. This is lazy and old school way of thinking.
How and why WOULD you need to prune a Crape Myrtle? The best time to prune the Crape Myrtle is actually in late Winter around February or even in early Spring, just before the Crape Myrtle goes on a growing spree. Cut branches selectively to encourage nice branching when the tree is young. If you remove a branch, make sure there is a reason. Almost all Arborists recommend removing crossing branches and branches growing toward the center of the tree. Side branches can be removed gradually up to a height of 4 or 5 feet to expose more of the trunk and give it more of a tree form. Small twigs or branches in the center can be trimmed out to create more open space for sun and air movement while the plant is dormant. You should also take out water sprouts in the canopy or suckers at the base of the tree. These are the leggy little things that seem to sprout out overnight.
Or, the easiest thing to do would be to just let Mother Nature do her thing and let them grow naturally, kind of like this:
Happy Growing!
Darren
Blog writers side note: As many of you that know me, know that Crape Myrtles are NOT one of my favorite plants. I think of them as messy and just not attractive. I do, however, hate them even more when they are turned into a hat rack and think that they should just be left alone.

Sunday, January 23, 2011

WAIT!

Wait, probably one of the words I have used the most often the past couple of weeks. One of the hardest words to udder for a gardener, let alone for a gardener to hear. As any of you that follow me here or on my Facebook page know, I have been screaming to get outside and do something. I, of course, have been sneaking out on some of the nicer days to do a few things, repot my Blueberries, plant some Lettuce and other cool season crops, planting some Onions, and started re-arranging some of the pots for the plants to soon go in them. I bring this up because I have gotten numerous phone calls and e-mails asking about a few things that people want to do in their yard.
First off, many want to start cleaning up their yards. WAIT! If your yard looks anything like the above picture, good for you. This isn't the best picture for my point, but it will do. I encourage people not to rake up their leaves in the Fall and let the dead plants stay there. This is Mother Natures blanket. It is protecting the roots from the nasty cold weather. So many people are worried that the neighbors will talk about how untidy the yard next door looks. Who Cares!?
How many neighborhoods have a "Yard of the Month" during the Winter? I would be willing to bet, none! Plus, as a bonus, that debris is feeding your plants. Think about the woods for a minute. I am not talking about the little patch of 50 trees at the end of the sub-division, I am talking the WOODS! Mountains, streams, lakes, you know....the place that so many like to go hike in? Does anybody rake up that plant litter? How well do the plants grow there? There is also nobody throwing any Miracle Gro around up there either. The food is provided by the decaying plant material.
Okay, fine, I won't rake up the leaves and clean up the yard. Can I trim the tall dead looking plants in my containers? WAIT!


These are containers of, Mexican Petunia, Bananas and Miscanthus in my yard. Basically the same principal applies here. We are coming to the end of January, still plenty more freezing temperatures coming. In 2010 we had a pretty significant snowfall in February. If I had cut this all back the snow and freezing temperatures might have done more damage than what it did do. The dead foliage is acting kind of like a mini greenhouse. It absorbs the heat during the day and keeps it bottled up through the night, thus protecting the roots. I usually wait until I either see new growth peeking out of the soil or the night time temperatures stay constantly in the 40's.
Makes sense so far?
What about going ahead and pruning some of my trees and bushes? WAIT!
This sad looking specimen is a Citrus tree. Republic of Texas Orange to be exact.  Believe it or not, it is still alive. Makes you want to take the pruners to it and cut off all that dead growth, huh?
Nope, not a good idea. First off, I am not sure of the extent of the damage. I may not cut enough off and will have to come back a second time, OR, I may cut off too much and take away some live wood.
Second, there is the chance I will initiate a premature flush of new growth which could be killed if/when we get another hard freeze. The best thing to do here is wait until the tree tells you it is time to prune. How? Again, when the temperatures are constantly staying in the 40's and there is a new flush of growth. And here again, the hanging leaves are giving it a little bit of protection from the cold and frost.
Even just leaving a layer of leaves in a container like this is beneficial:
This is a container of Salvia that comes back every year. I know it reseeds itself, but I have taken the leaves out of the pot in previous years and the plant didn't come back as well. I am convinced the leaves either fed or protected the seeds. Either way, the leaves stay until I see new growth.
Is there ANYTHING I can do in the yard right now? WAIT, I do have something.
Dormant oil.
Dormant oil kills garden pests on woody plants like trees and shrubs just when damaging insects are waking up from their Winter's nap. These are highly refined oils (Not motor oils!) which spread uniformly on the bark of trees and shrubs to which it is applied and coat non-mobile, dormant insects on the tree smothering them to death. Gardeners usually use dormant oil on trees and shrubs in the Winter because there is no growth. The use of a dormant oil mixture will not only kill, but annihilate, annual flowers such as Pansies, Bluebonnets, Snapdragons or any other annual you may have growing under or near plants to be treated. To insure their well being, completely cover such tender vegetation BEFORE spraying nearby trees and shrubs with the dormant oil. Fruit trees and shrubs especially benefit from an annual dormant oil application because of their susceptibility to pests. Here is a good candidate for a Dormant Oil treatment:
Blueberry bushes.
Just make sure you follow any and all directions on the package, not only is it the law, it could spare your plants life.
So, let's review. If your yard is a leaf litter disaster, wait, to clean it up.
If the plant is all tall and dead looking, wait, to cut it down.
The trees look like they need a haircut, wait, to prune them.
If the neighbors are complaining that your yard looks like a disaster, tell them just WAIT, until Spring.....my yard will look better and healthier than yours....nanny, nanny, boo,boo!
Happy Growing!
Darren
Saturday, January 15, 2011

On Gard!

No, the title is not a typo, I meant it that way. Just before going to the Green and Growin trade show this past week, one of my followers and I were discussing Gardenias.....yup professor it was you. Then at the trade show I had two more separate discussions about Gardenias and the trouble with growing them. I though this would be a good time to help some folks with this interesting, sometimes hard, fragrant plant.
Gardenia is a group of about 200 species of flowering plants that are in the Coffee family, Rubiaceae, native to the tropical and subtropical regions of Africa, southern Asia,and Oceania.
Gardenias were named by Carl Linnaeus after Dr. Alexander Garden (1730-1791), a Scottish-born American naturalist.
The common Gardenia that the majority of us know is Gardenia jasminoides also known as Cape Jasmine, Cape Jessamine and recently as Gardenia augusta. It attains a height of 2 to 6 feet and with its shiny green leaves and fragrant white Summer flowers, it is widely used in gardens in warm temperate and subtropical climates throughout the world.
The cultural requirements are acidic soil, having a PH of 5 to 6.5, ideally moist and high in organic matter, such as compost or ground bark, but make sure it is well drained. This is probably where most people go wrong, in their watering or soil media. The soil should be kept uniformly moist, but don’t overwater. High humidity is also essential to Gardenia care. Avoid misting the foliage, though, as leaf spot fungal problems will develop. I will discuss this later.
Their light requirements are going to depend on where you live and where you want to grow them. Plants prefer full sun if they are grown indoors; if grown outdoors for the Spring, Summer and early Fall, keep plants in partial shade. Partial shade being about 6 hours. They are listed for zones 8-10, if they are given a little bit of protection, I would say they could go to a 7.
When it comes to fertilizing, do it monthly between April and September with an acidic fertilizer, fish emulsion or blood meal. Do not fertilize Gardenias after September. Doing so will stimulate tender growth, which may be killed if/when the temperature drops below freezing. Gardenias are cold-sensitive and during severe Winters can be killed to the ground, often they regenerate in Spring. A very good layer of mulch can save the root zone if this should happen. Apply in Fall.
Prune shrubs after they have finished flowering to remove straggly branches and faded flowers. Pruning should be early enough to allow new growth to be at least 4 - 6 inches long by October 1. Pruning after October 1st decreases next year's blooms.
Occasionally there will be a problem with yellowing leaves. Yellowing of leaves may be due to a number of causes, such as insufficient light, over watering or poor drainage, soil temperature that is too low, nematode damage or disease. Some yellowing on older leaves is normal and may occur during the Fall and Winter months before new growth appears.
The biggest problem with Gardenias is their attractiveness to insects and other pests such as aphids, mealybugs, spider mites, thrips and scales. These can all be controlled with Horticultural Oils and Insecticidal Soaps. Please read all directions and make sure that Gardenias or the insect that you are targeting is listed on the label. The label is the law!
Diseases that affect Gardenias can also be numerous.
Sooty Mold
Is an organism that looks like a disease, often occurring on Gardenia foliage, turning it black. This black, smut-like substance does not injure foliage, but prevents sunlight from reaching the leaf, thereby reducing photosynthesis. The organism is not parasitic,meaning it does not actually live off the plant, but lives on honeydew secreted by sucking insects, such as aphids, scales, mealybugs and whiteflies that I listed above. Sooty mold can be managed best by controlling these insects.
You can learn more about Sooty Mold by reading my blog posting HERE
Other diseases that can occur are:
Rhizoctonia Leaf Spot
Leaves infected with this fungal leaf spot disease have tan to brown spots up to 1/4 inch in diameter. Spots are circular. The disease begins on the older leaves and spreads upward when the plants are watered excessively or when air circulates poorly because of overcrowding. Avoid wetting foliage when watering or misting, even if you are trying to raise the humidity level.
Powdery Mildew
This disease is characterized by white, powdery spots on leaves. Use a preventive fungicide to control.
Canker
One of the most common Gardenia diseases, canker is identifiable by a main stem swollen near or below the soil line. The bark becomes corky and contains numerous cracks in the cankered area. The stem above the canker is bright yellow in contrast to normal greenish white. If the humidity is high, a yellowish substance may be seen on the surface. Affected plants are stunted and die slowly. Destroy all diseased plants to prevent spread of this disease.
Propagation is rather easy. The most used method is by cuttings in moist soil, especially in warm Summer months.
Here in my Zone 8 Charleston, Gardenias bloom in mid-Spring to mid-Summer. The flowers are white, turning to creamy yellow as they age, and have a waxy feel.
This was from my plant this past Spring. The smell was amazing, such a shame my wife hates it!
I should mention, another one of the most irritating problems encountered with Gardenias is "Bud Drop". This is when the flower buds abort just before blooming. Common causes include low humidity, over-watering, under-watering, insufficient light, high temperatures, rapid temperature fluctuations, cold drafts or change in plant locations. So basically, Gardenias can be temperamental!
There are many cultivars available. But, lets say you are rather limited on space, one of my favorites is Gardenia jasminoides 'Radicans'.
The flower looks like this:
It is a very slow growing plant that only attains a height of 1 to 2 feet. It blooms a little later than most of the other cultivars and the flower size is smaller. The smell is still fantastic.
I hope this has given you some inspiration to go out and get yourself a Gardenia. I personally love my mine. I may be originally from the North, but along with the Magnolia, the Gardenia is a traditional symbol of the American Deep South.
Happy Growing!
Darren