Sunday, November 24, 2013

Word For The Day Was......

Over the past few months I have been working several events with my fellow Master Gardeners. At many of them we were selling books and plants to raise money for the association. At each event the word of the day was....Farfugium!
Pronounced just like it looks.....Far-Fu-Gee-Um
No, this is not some kind of foreign curse word or a kind of exotic food dish.
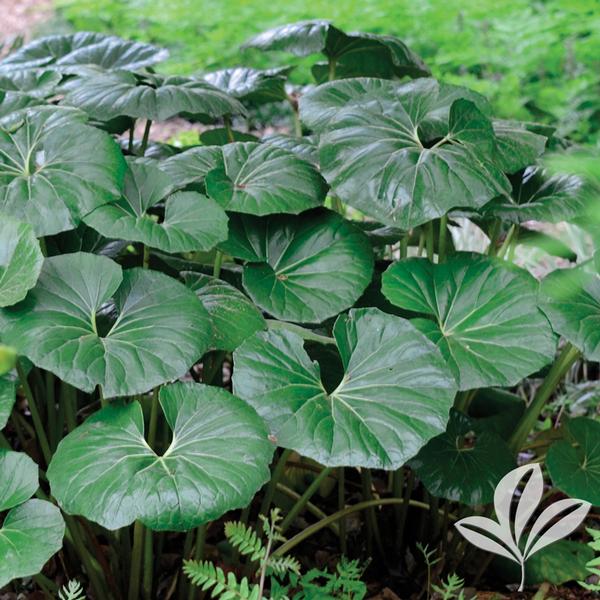
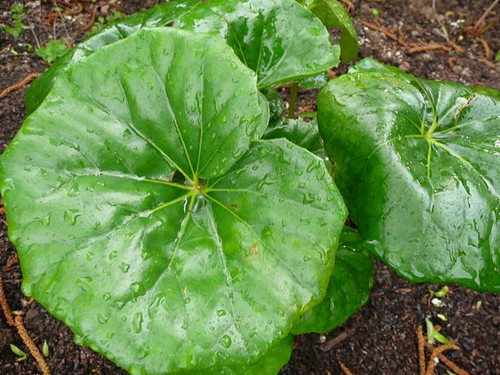
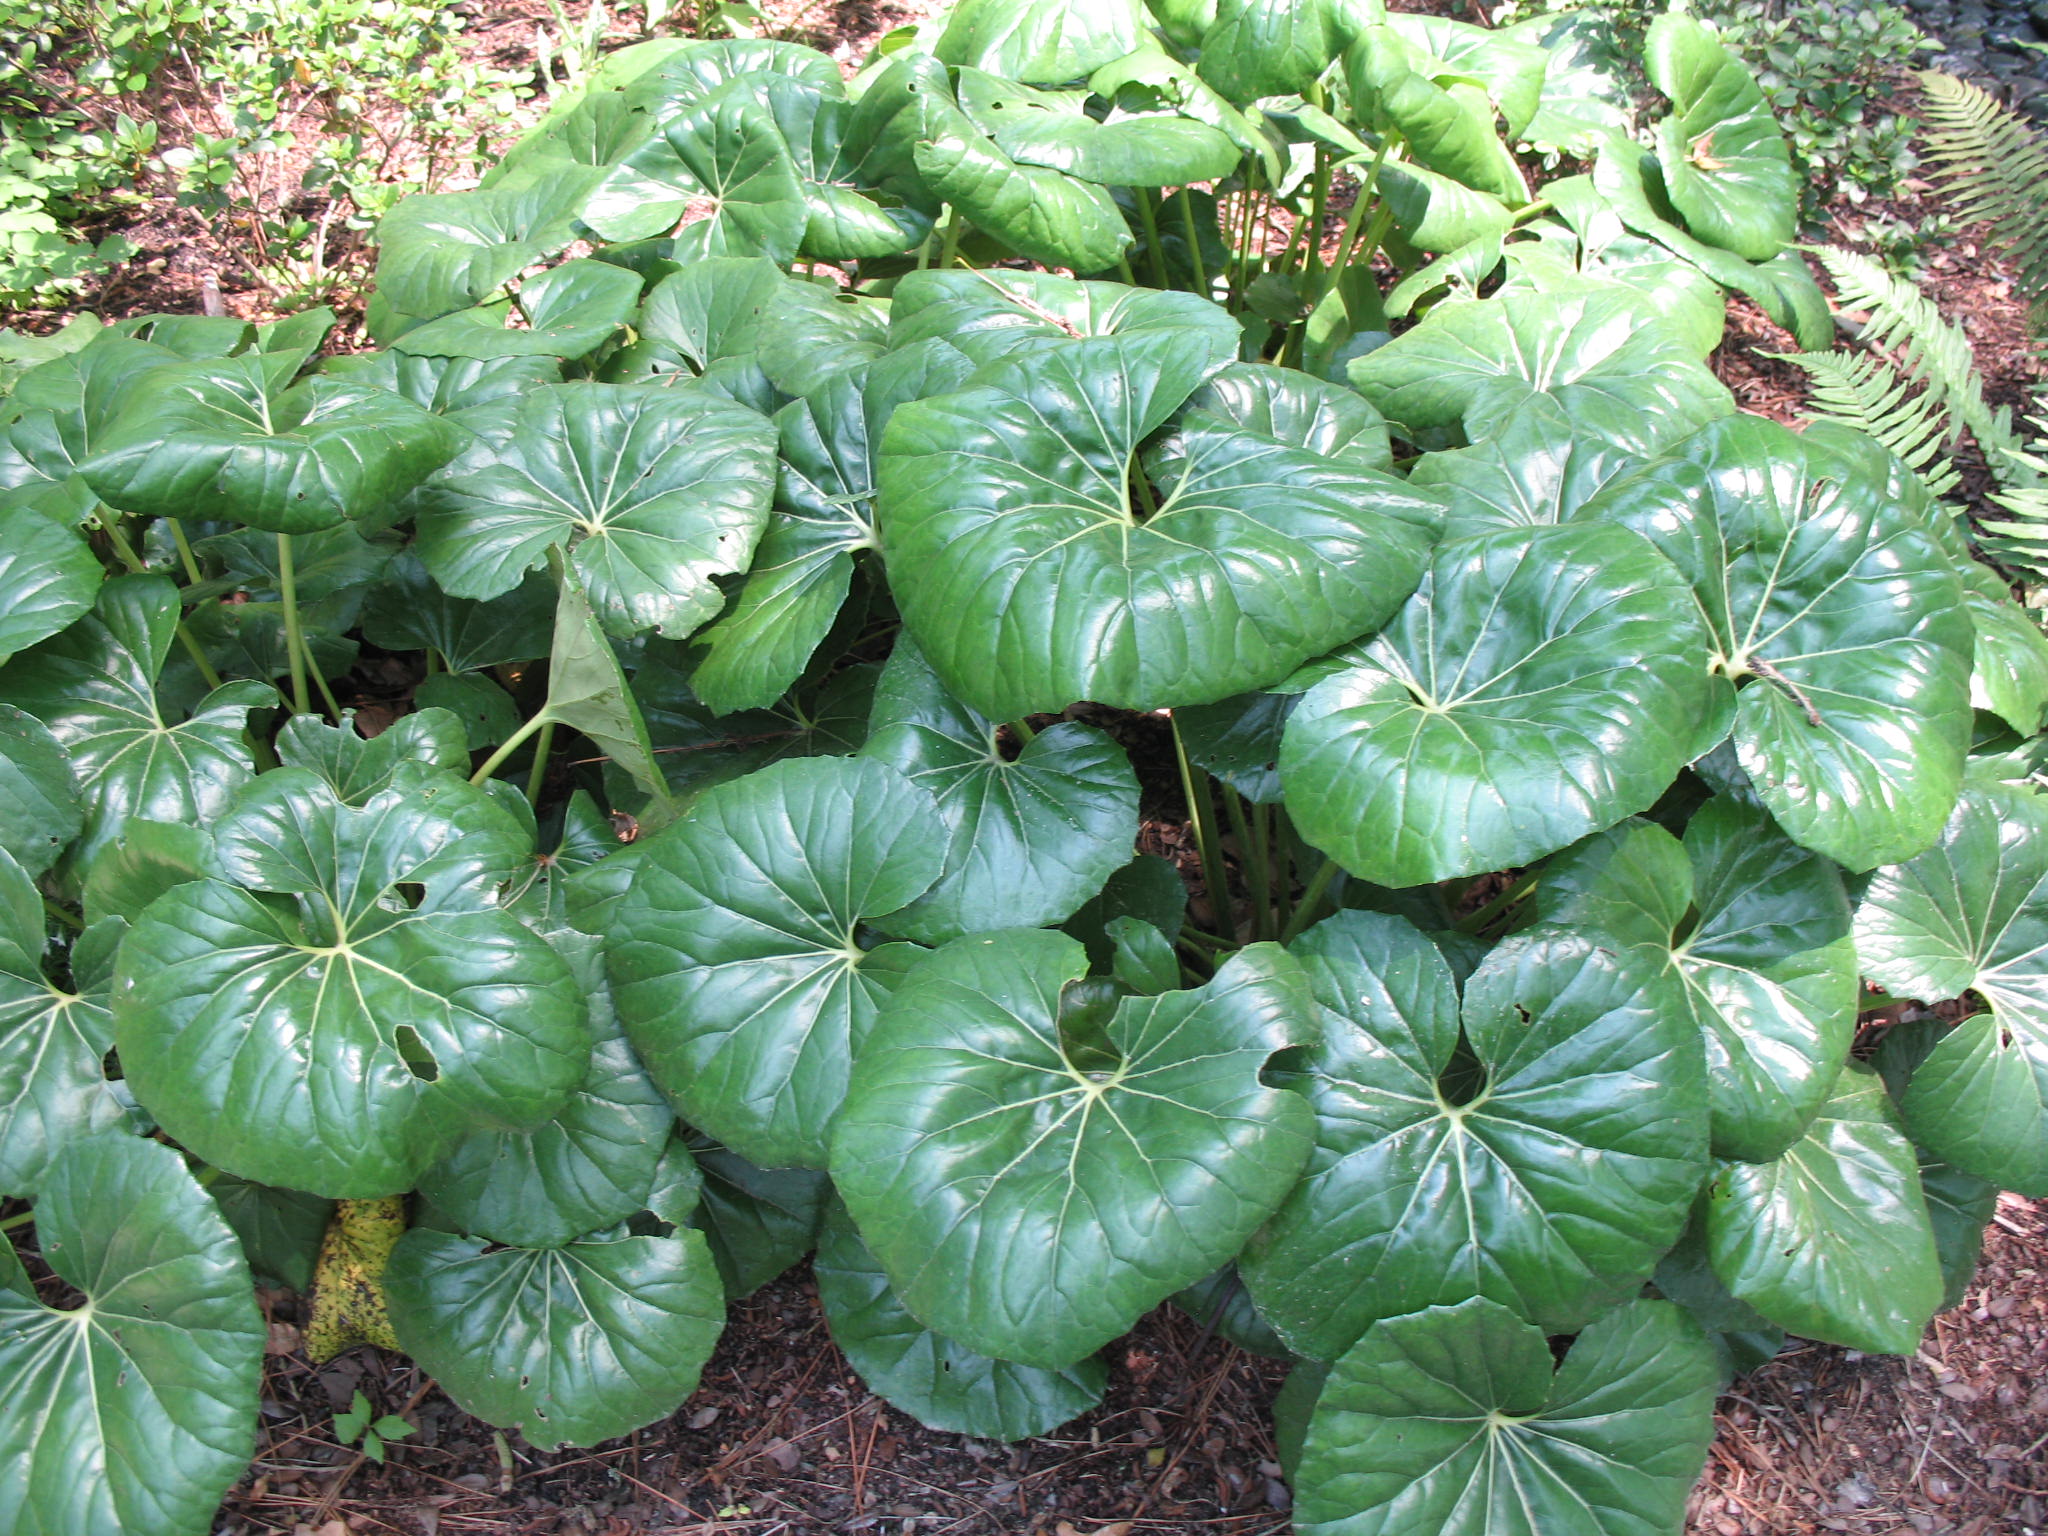
Botanically it is known as Farfugium japonicum. It also goes by the common names of "Leopard Plant", "Green Leopard Plant",and "Ligularia". The running joke among ourselves was "It looks like Dollar Weed on STEROIDS"!! See for yourself:


Here in the South, we tend to be jealous of our northern counterparts that can grow Hostas. Between hot humid Summers and our mild Winters, hostas in the South are sad at best and downright miserable in general.
This could very well be our answer.
They will survive in Zones 7-10 and may go as far north as Zone 6 if grown in a protected area. Temperatures below 30 may kill them back, they are quick to recover once the Spring time temperatures return. Places farther north can very easily grow these in a container and protect them inside during the Winter.
Containers should be placed in part shade to almost full shade locations with protection from strong winds. 
Which corresponds with their outside growing preferences. This plant prefers partial shade. Protect from midday sun or it will tend to wilt every day in Summer.
Being that this is a shade plant, you can probably guess that it likes a moist, woodsy, type of environment. You would be correct! It does not tolerate wet, soggy situations however. Drainage is a must. If need be it can be grown in a drier area as long as there is a good layer of mulch.


The leaves can be anywhere from 4-10 inches across. They come in rounded or kidney shaped with wavy or toothed margins. Average mature height and width is around 2 feet. They spread by shallow rhizomes.
There are a number of different cultivars available and not just green either!
The cultivar 'Argenteum' (a.k.a. 'Albovariegatum') has leaves mottled with irregular creamy white margins.


Then there is the "True Leopard Plant"  'Aureomaculata', has random yellow spots all over the leaves.


'Crispula' or 'Crispata', sometimes called "Parsley Ligularia", has ruffled leaves.


Now I know that there are not near as many varieties, colors, styles and such as the Hoastas, but these are pretty cool huh?
Well there is one more interesting aspect to these shade lovers....They Flower!!
 Daisy-like, yellow flowers that are 1-2 inches across,  bloom on top of thick, mostly leafless, stalks that rise  up to two and a half feet above the foliage in late Summer to Fall. 

When it comes to problems, there are very few. Deer do not seem to bother them, however,  Slugs and Snails can significantly damage the foliage. A little beer or slug bait can handle this. Occasionally you will get some Whitefly or Mealybugs, again some insecticidal soap will deal with these. There are no serious disease problems.
 Propagation is usually done by dividing the clumps in the Spring or by planting the seed.
In the Spring you can also give them a shot of your favorite slow release fertilizer, then forget about feeding them until next year.
So, how is that for a relatively carefree plant?
I urge you try growing some Farfugium, especially if you have a tough, shaded area that just does not seem hospitable to anything else.
We had a heck of a time keeping these plants in stock at all the events. Despite numerous deliveries, we just could not get enough of the Word For The Day......FARFUGIUM!!
Happy Growing!
Darren


Wednesday, November 20, 2013

FRUITMANIA GS

Here is a GREAT thing going on in the Charleston, SC area February 22, 2014. If you have any questions, please feel free to ask. Fruitmania Garden School 2/22/14 on Square Market Happy Growing! Darren

Saturday, August 17, 2013

Behind the Bushes

When you are out plant shopping at one of the big box stores or even your local favorite nursery, have you ever stopped to think about how much work went into that plant? Why it might cost as much as it does? Or why the plant next to it, even though it is the same size, costs way more?
I was at one of those big box stores not too long ago and heard somebody asking some of those very questions. I also heard, "it is just a plant, WHY is it so expensive?!"


Working in the nursery trade now for almost 10 years, I have learned a LOT!
So, I thought today I would help explain, Why that plant is so expensive and what all goes into one.
I will start at the very beginning with propagation.
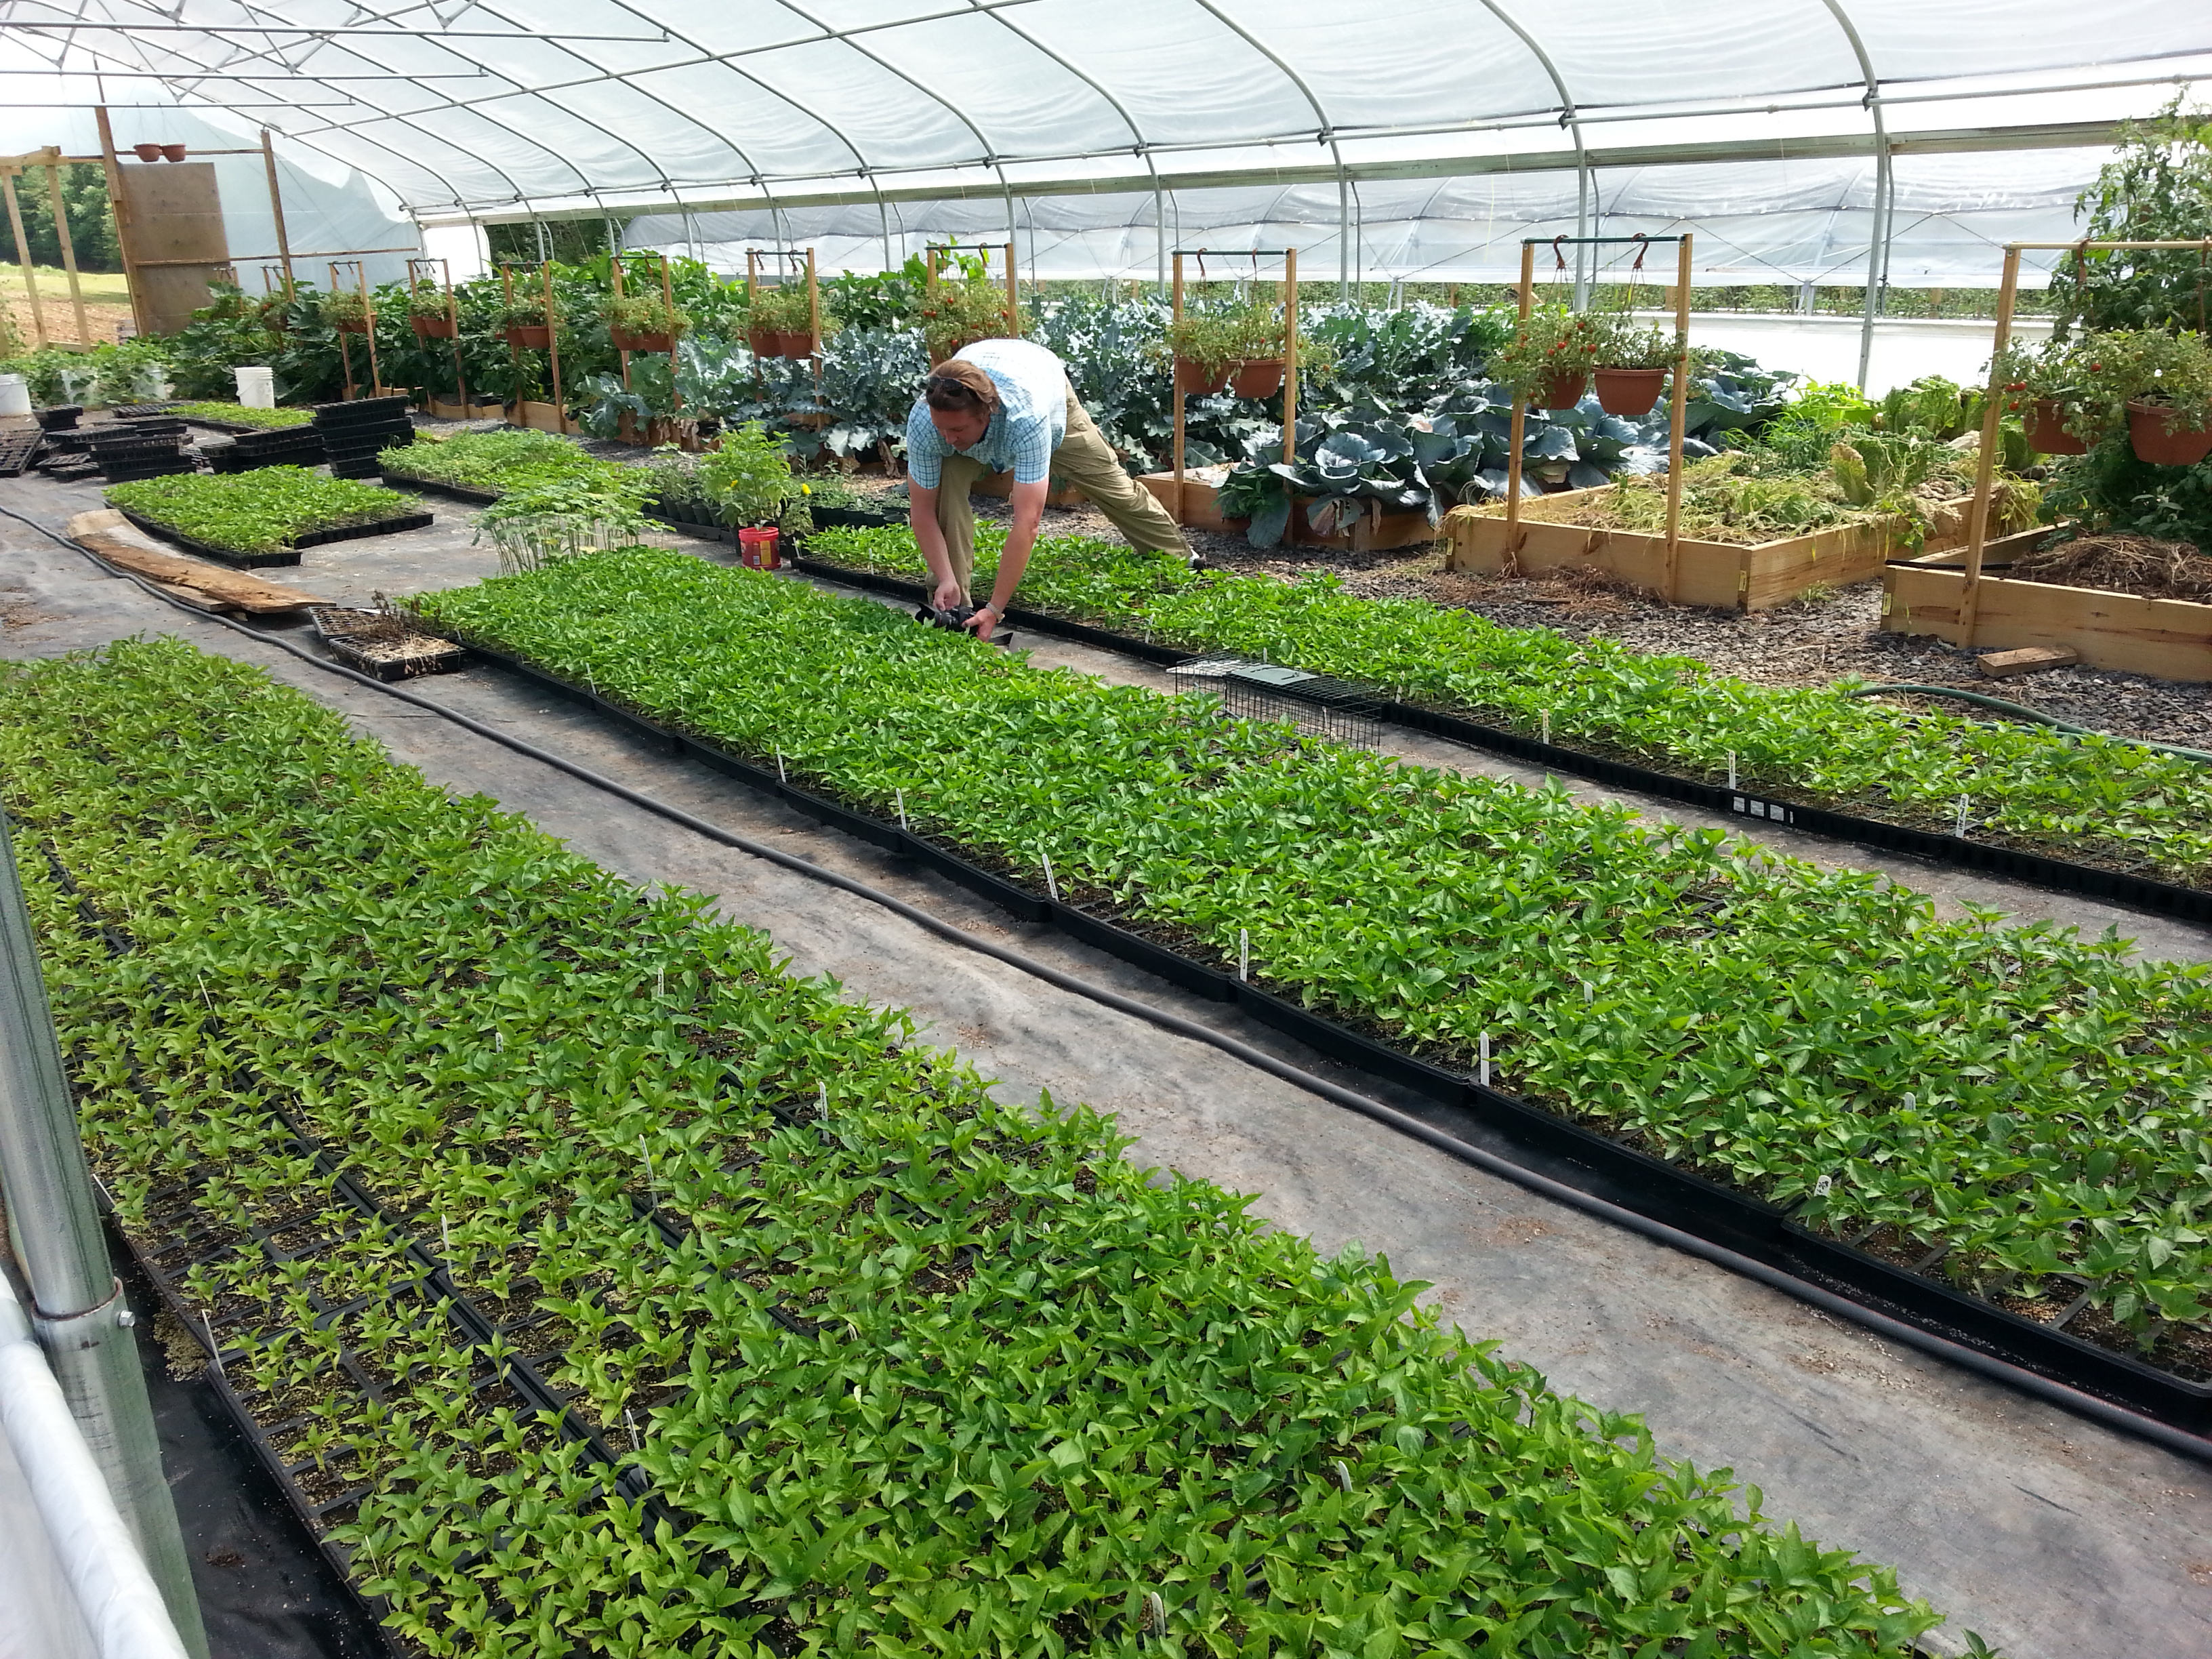
At the nursery I work at, this is the time of year that we send a bunch of the girls out into the field to take cuttings. As you can imagine, this is very time consuming. You don't want to take too many from one individual plant and ruin the look of that particular plant. So each plant might have two or three cuttings taken from it. They will probably take anywhere from 5000 cuttings on up, depending on what type of plant we need more of. They then have to sit there and prep the cutting. Length, amount of leaves still on it, angle of cut on the bottom, etc. If you have ever done any propagating, you know the routine. Now multiply that by thousands. They then dip it in a rooting hormone and stick it in pots filled with the soil medium.
Sounds pretty labor intensive doesn't it?
That cutting that they just stuck?
It will be ready to sell in the size pot shown above, in about 2 years. That is an average, there are some species of plants that root and grow quicker. Something like, Ligustrum will root and grow MUCH quicker then say, a Camellia.
In that two years a few other things happen that will add to the cost.
Things such as fertilizer. It will get fed 2 or 3 times, depending on the species.
It will be repotted a couple of times. It starts out in a rooting tray. Then gets put into a one gallon pot. Finally a three gallon pot. There is also the labor involved in repotting it. Every time a plant gets touched there is labor involved. Even at minimum wage, that can get expensive. You don't work for free, right?


Speaking of labor, there is the process of spacing them out. When the plants are little they can be kept "can tight". The edges of the pots put up right next to each other. As the plants get bigger they need to be spread out so they have room to grow, allow air space to help prevent disease, and allow the water to get down into them better. I mentioned that these plants will be at the nursery for a couple of years, in that time frame Winter will rear its ugly head. While the plants that we grow are adapted to our Zone 8 growing area, that is when they are in the ground. They are a little more cold sensitive up in the air, as it where, in those pots. So, those plants need to be moved to a cold frame. More labor used. They will still get chilled, but not frozen should we have a bad Winter. My boss was telling me he learned a valuable lesson one year. An entire bed of Society Garlic froze to death because they were not protected. We are talking thousands of plants here. That's a bunch of money lost. I know what you are asking, why not keep them in the cold frame all the time?
Answer: The cold frame is covered with plastic. In the Winter, while dormant, they do not need as much sun and can be covered this way. During growing season, they need sun. So, labor can be used to move the plants, OR, labor can be used to put up and take down the plastic covering each year. Are you starting to get the idea that labor is your biggest cost?
Okay, then there is the cost of the potting soil each time it is transplanted. Plus the cost of the pot. On average, the price of a one gallon pot is 15 cents. The price goes up to 45 cents for a three gallon. The pots are petroleum based and the price fluctuates with the cost of oil, we know what that means right now.
I have not even mentioned the cost of electricity to run the pumps to water these plants, every day.

Photo courtesy of North Carolina Cooperative Extension


When you are out choosing your plants and you have the choice between one that is beautiful, full of nice green leaves, no holes in the leaves and no weeds in the pot, compared to a half eaten, weedy specimen, which one will you pick?
The way the nursery sends those beautiful plants is with the use of insecticides and herbicides. Believe me when I tell you those things are NOT CHEAP! For a relatively inexpensive herbicide, to cover about an acre of plants, it can easily run you $300+. Then there is the labor to apply said products. There is that L word again.
The cost to weed these plants by hand is even more outrageous.
Oh yea, don't forget the cost of putting the plants on a truck to ship them. The cost of the driver, fuel, truck maintenance, etc.

 
Photo courtesy of http://gardenershelpinggardeners.com


I bet by now you are seeing the pattern here.
If all of this where not enough and you have ever taken any kind of business class, you will understand the next phase, Supply and Demand. The recent economic downturn scared a lot of growers. They were afraid to plant any new liners for fear the plants would just sit there and not get bought. This has caused a gap in supply. Remember the two year time frame? If you don't plant anything or very little, the plants can't suddenly grow and be the right size to be sold. There were a few growers that rolled the dice and planted, but there are certain plants that just can't be found right now. Want a couple of examples?
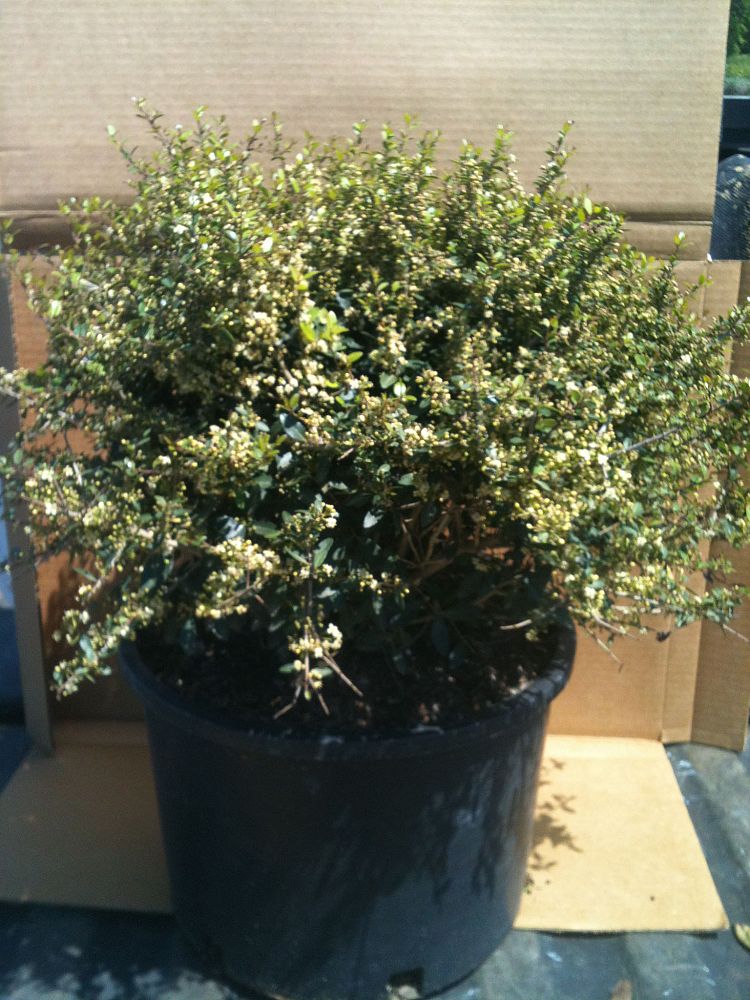
Viburnum suspensum


Three gallon Viburnum suspensum are extremely hard to come by and when you do, they are pricey. Supply and demand.
There are also larger things that are getting tough to find.
Fifteen and thirty gallon Podocarpus macrophyllus.


Everybody kept buying the smaller ones and there were very few left to pot up to a larger size. Again, supply and demand. If you have the larger sizes you can get more money for them.
Again, I mention the two year growing time. Tree growers are in an even longer window and there will be shortages of trees in the very near future. They have to think 5-10 years out.
I am not trying to make you feel sorry for the nurseries, they will come through this. What I want you to take from this article is this; the next time you pick up a plant to purchase, ponder how many people have touched it in it's life. Think about all the time and money spent on it, then consider, is $6.95 or whatever the price, REALLY such a bad deal?
And remember, There is always more, Behind the Bushes.
Happy Growing!
Darren
Saturday, August 10, 2013

Take Root

Today's article is going to be a little off the beaten path for me. I don't usually recommend products here, other than some of the stuff put out by Espoma (i.e. Citrus Tone and Holly Tone), but I have come across a company and, so far, these couple of things that I will talk about, are showing some good promise.
As you all know, I like to experiment with growing different and unusual plants. Finding different, easy, cheap ways to grow them or propagate them. Things that the average poor homeowner might be able to pull off.
Camellias have become, for lack of better wording, an obsession. I am a competitive person and love to see how I stack up against other people and their ways of growing things. However, Camellia plants are VERY expensive to just go out and buy. If you have friends that grow them or maybe a nursery that you are in good with, today, I will show you an easy way to multiply your collection.
I will start with the basics.
The best time to root Camellia cuttings is Summer. The wood should be semi-ripe. Not hard and woody and not green and very pliable, a kind of in between.
To root the Camellias, or any other type of plant for that matter, you basically need a pot or container, a medium in which to stick the cutting into, light, humidity and of course, the cutting.
I have created a humidity chamber out of rubbermaid type containers. They look like this:


The thing with the tube going into the first picture is a reptile fogger. As you can see, I have three different container experiments going on here. Two large and one smaller. One of the large ones has the fogger going into it. The idea of the fogger is to provide humidity. I run it for 30 minutes, then off for 30 minutes while the lights are on. The lights are on for 18 hours and everything is on timer switches. You only want bright indirect light. Don't put the light directly on the plants, it will just fry them.
When the fogger is on it looks like this inside:


The temperature stays between 70 and 85 degrees.
Okay, that takes care of the light, warmth and humidity.
I use a 50/50 mix of fine pine bark and perlite as my soil medium. It is well draining, light, yet holds some moisture.
This is where the products I was telling you about come into play.
I take a Camellia cutting, about 6 inches long, cut all but the top two leaves off. I then cut those two leaves in half to help retain moisture. I scrape a little of the bark off at the cut end and dip it into Dyna-Gro Root Gel.
It looks like this:

I think there was a horror movie made with stuff that looked like this. LOL
Also possibly a Ghostbuster was hit with it.
I have used all kinds of rooting products before and got so-so results. This is so much easier to use. The theory behind the gel is it seals the cutting and functions as an artificial root system until the cutting develops its own roots.
You will want to have your pot filled with your medium of choice and, using a pencil, poke a hole into the center of the medium so you don't scrape the gel off.
The stem will look like this:


And the final product will look like this:


Always make sure you tag your cuttings, preferably with the botanical name of the plant, but at least the common name. I promise you, even if you stick only one cutting, you WILL forget the name of it. I like to put the date that they were stuck too. That gives me a better idea of when they might be ready to start checking for roots.
Usually I start checking 6-8 weeks after I stick them.
I mentioned that there where a couple of products I wanted to discuss. While the Root Gel seems to be working exactly as planned, Dyna-Gro has a couple of other things as added insurance to your success.
For all intents and purposes, I am using a mist system to propagate my Camellias. So, I am also using K-L-N Rooting Concentrate and Pro-Tekt Concentrate.
The directions are: Mix 1/2 teaspoon K-L-N and 1 teaspoon Pro-Tekt per gallon of water and add to the systems holding tank. Keep the cuttings moist. I have had to modify this slightly. I made the mixture and using a spray bottle, I spray the cuttings by hand a couple of times a day.
The K-L-N rooting concentrate is pretty self explanatory. It is just a little more of a kick to get roots to form.
The Pro-Tekt Concentrate I actually find fascinating. Reading directly off the bottle, "contains potassium and 7.8% silicon to reduce stress caused by heat, cold, drought, insects and disease".
This stuff is not just for rooting cuttings either. It has directions for maintaining your plants and hydroponic production. It can be applied with your irrigation and/or as a foliar spray.
This is what my cuttings look like after a month:


Not great pictures I know, but trust me when I tell you they look good. Like I said, I have tried other rooting agents and after a month I was losing them quickly. The leaves would start falling off and they would just up and die. These are not.
I am not one for pushing products just willy nilly. If I mention something here on my blog, I have actually used it and like what I see.
So far, I like the results.
If you would like to contact Dyna-Gro yourself and ask them any questions, their website is HERE
Or you can call 800-Dyna-Gro
Just as a side note, I have some WONDERFUL friends that have allowed me to come into their yard and take some cuttings or have sent me cuttings from their yard in other states. I also want to thank a local nursery that has basically a forest of old Camellias, some more than 50 years old, that allowed me to come acquire some cuttings. You ALL are great!!
As always, if you have any questions for me, I am only an E-mail away: TheCitrusGuy@netzero.com
Happy Growing!
Darren 


Saturday, July 6, 2013

Leave the Leaves Alone!

Everybody knows what the leaf of a plant is. They are the parts that contain chlorophyll which converts carbon dioxide and water to simple glucose sugars in the presence of sunlight. Simple, right?
Now, I have talked to some folks, and we have debated the question, are the leaves the heart of the plant? Some think it is the roots, others think it is the stems, others say the sum of all the parts are the heart. I am not going to go into that here, though someday it might make for an interesting poll question.
No, today, I want to talk about "what the leaves are telling us". If there is some kind of issue going on with the plant, be it insect, disease, or some other pressure and you know what to look for, then you can take appropriate actions.
Let's start with one, very briefly, that I have discussed before.....Citrus Leaf Minor. I get folks calling me in a panic because they think that they have some terrible Citrus disease because their leaves are all curly and have weird squiggles in them. Very often they look like this:

or this:

Thankfully, it is just cosmetic damage, a plant this size will be fine. You can read my article on this particular pest HERE
Another cosmetic damage producing insect is from the Megachile spp. family, better known as the Leafcutter Bee.
If you have ever grown a Red Bud Tree (Cercis canadensis), then you know what the leaf looks like:


But, have you ever seen a leaf that looks like this?


This is caused by the Leafcutter Bee. They don't actually eat the cut pieces of leaves that they remove. The female uses them to line her nest. Leafcutting bees construct these nests in soil, in holes in wood, or in plant stems. Actually any small hole will work such as shells of dead snails, holes in concrete walls (like those produced for hurricane shutters) and other holes in man-made objects are used as nesting sites. I actually found a nest one time in the drainage hole of one of my potted plants.
Leafcutting bees are found throughout the world and are common in North America. In Florida alone, there are approximately 63 different species!!
Most of the common Leafcutter Bees are approximately the size of the common honeybee, although they are somewhat darker with light bands on the abdomen.They are solitary creatures and are not aggressive. They sting only when handled. If you do happen to get stung, the sting is very mild, much less painful than that of honeybees or yellowjacket wasps.There is no need to try and control them, they are actually our friends, other than the cosmetic damage they create, they are important pollinators of wildflowers, fruits, vegetables and other crops. So if you see some damage like this, just know that you are helping a mommy bee rear some new young that will eventually help you produce something to eat.
Well then, we have discussed two different kinds of insect pests, now lets discuss a fungal problem.
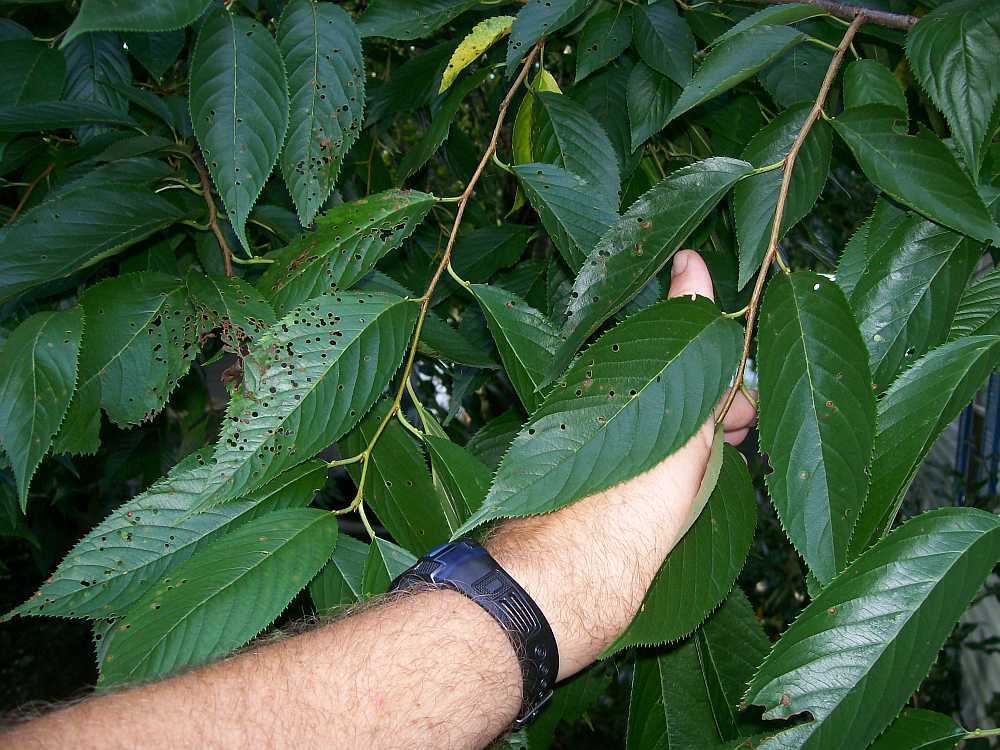
I am sure this probably affects other trees, but the main ones are Cherry (sweet, sour and ornamental), Plum, Peach, Apricot and all other stone fruits. The problem? It looks like somebody has been practicing with a shotgun:


No, your next door neighbor's child has not been out with their BB gun either. This is caused by the fungus Blumeriella jaapii, also known as Cherry leaf spot, or shot hole disease. Initial symptoms appear as reddish to purple spots on the leaves. After several days, the spots turn brown and drop out of the leaf, thus, forming a "shot hole". Infected leaves eventually turn yellow and fall from the tree. Shot hole fungus commonly overwinters inside the infected buds, as well as twig lesions, where the spores may thrive for several months. Infections can occur anytime between Fall and Spring, but is usually most severe following wet Winters. Prolonged Spring rains can also encourage this disease, as spores are spread from the splashing rain.
This disease is difficult to control, and chemical sprays are not practical for the home gardener.

These are just a few things that leaves can tell us. It may not always be as obvious as the examples above. Sometimes it might just be a small variation in color or the leaf might be a different size then it should be. The best habit I can suggest to you is, inspect your plants on a regular basis, that way when something odd starts to occur, you will be on top of it.
If you find something odd on your leaves, please don't hesitate to ask me what it might be. You can send
 your questions and pictures to TheCitrusGuy@netzero.com. If at all possible, pictures are the best thing you can send me to help identify the issue.
There is one other thing that you can try. If there is a problem discovered, you can look at the plant and scream...."Leave the Leaves Alone"!!!
Happy Growing!
Darren

Sunday, June 23, 2013

Respecting the Elders

With my job at the nursery, I get to drive around a lot. I get to meet all sorts of different people and see different plants. I have noticed this year, with the abundant amounts of rain that have been falling, that many plants are doing very, very well, except the Gardenias that I have seen, that is a story for another day.
One of the things that seem to be doing exceptionally well are the Elderberries (Sambucus spp.).
If you are not familiar with this plant, you have probably driven by some without even knowing it. Have you seen anything like this along your travels?


These North American natives are often found growing wild along roadsides, forest edges, and abandoned fields. Elderberries are so common, people have considered them a "ditch weed".
 They are attractive and easy to grow. They are at home in a Country Garden style landscape or a formal one. Not only does the plant look nice, the flowers and fruit are edible.
Elderberries grow best in a moist, fertile, well-drained soil with a pH between 5.5 and 6.5, but will tolerate a wide range of soils. It's a myth that they prefer swampy areas. In fact, they do not tolerate poor drainage.
In the wild they can range in height from about six feet to sixteen feet. The ones I have in my containers are still fairly young, 3-4 years old. They have never gotten above 5 feet before the cold knocks them back. 
They  grow well in full to partial sun locations and respond well to fertilization. The need for fertilizers can be judged by looking at the plant. If the bush is very vigorous, producing a lot of new growth, no fertilizer is needed. If few new canes are produced and growth appears poor, you may need to feed it. They grow best when fertilized annually with compost.
Elderberries have very shallow roots, so weeds can be a problem.  Use mulch for weed control and weed them by hand the first year or two. They will eventually form a dense enough shrub that will choke out the weeds themselves.
When it comes to the pruning of elderberries it is generally very simple. Weak, dead or broken canes should be pruned out, leaving six to eight vigorous canes to a plant. In late Winter, prune out branches more than 3 years old since these are less productive. Flowers and fruit develop on the tips of the current season's growth, often on the new canes but especially on laterals. Second-year elderberry canes with good lateral development are the most fruitful.
 Speaking of fruit, just take a look at this:


Isn't that beautiful?
They are used for wines, pies, jams and many other tasty treats. I have heard of folks using Elderberries in place of blueberries in recipes and it was fantastic. These things raw are not very edible, though there are folks that like them that way, there are also people that like Justin Beiber, so there is no accounting for taste. I have read that drying them makes them a little more palatable too, so it might be worth a try.
If you are hungry and just don't want to wait until the fruit ripens in late Summer, eat the flowers.


The white flower clusters make delicious fritters


Basically you dip them in batter and deep fry. There are all kinds of recipes online, search them out and give it a try.
These plants are really pest free, there are very few things that bother it. 
You can propagate new plants from softwood cuttings in the Spring, semi-hardwood in the Summer or from Winter hardwood. Elderberry plants can spread by rhizomes, you can also use layering, or dig up the suckers. There are numerous cultivars available at some nurseries, you will probably need to search out a Native Plant nursery to find them. A few to look for would be 'York' and 'Nova'. It is recommended that you have two different varieties for better fruit production. My feeling is, they are all over the place, if you don't have room in your yard for more than one, there is probably some just down the road from you.  
I have met people that just do not like the taste of Elderberries, no matter what you do to them. If you just like the looks of the plant and the flowers and such, no problem, the birds will eagerly accept the fruit. 
As a final thought, if you want to really make a statement, look for the cultivar 'Black Lace'. It is a black leaf plant that has light pinkish flowers and looks like this:

Happy Growing!
Darren
 

Sunday, May 26, 2013

The Confederates

Being a Yankee by birth (New Jersey) and living in the South, I tend to get teased a lot. It is nothing serious, I know it is in fun (I hope), and I usually throw it right back. I currently live in Charleston, SC the birthplace, for all intents and purposes, of the Civil War. That war began with the firing on Fort Sumter, April 12, 1861.
South Carolina was one of the Confederate States of America which consisted of the governments of 11 Southern states that seceded from the Union in 1860-61. So it is fitting that I use this background to introduce today's topic. The Confederates.
There are some plants that use Confederate in their common name, which can actually get confusing, and I will discuss this in a moment.
The first Confederate I want to discuss is Confederate Jasmine (Trachelospermum jasminoides).


Contrary to its name, Confederate Jasmine is not native to the Southeast, nor is it a true jasmine. It is actually native to China. When supported, this twisting, twining vine can reach up to 20 feet or more. Without support and with some tip-pinching and pruning, it can be a spreading shrub or groundcover.

 It is a fast-growing vine that can be grown on lamp posts, trellises, or arbors. It will easily twine through chain link fences and makes a great, evergreen screen.


In early Spring and Summer, Confederate Jasmine produces clusters of small, white, VERY fragrant flowers that look like tiny pinwheels. This plant prefers full sun to partial shade. It likes a moist but well-drained soil, however it is drought resistant. It is relatively problem-free, though rabbits have been known to graze on it. It is primarily grown in USDA Zones 8 - 10. There are a few cultivars that are hardy to Zone 7. Propagation is done by cuttings as they root easily when taken in the Spring. This is probably the South's favorite flowering vine. I highly recommended Confederate Jasmine to new gardeners. It is easy to grow and satisfies with quick growth and a fabulous floral display. Who wouldn't want to come home to this?


The next Confederate I would like to discuss is the start of the confusing ones. Confederate Rose.


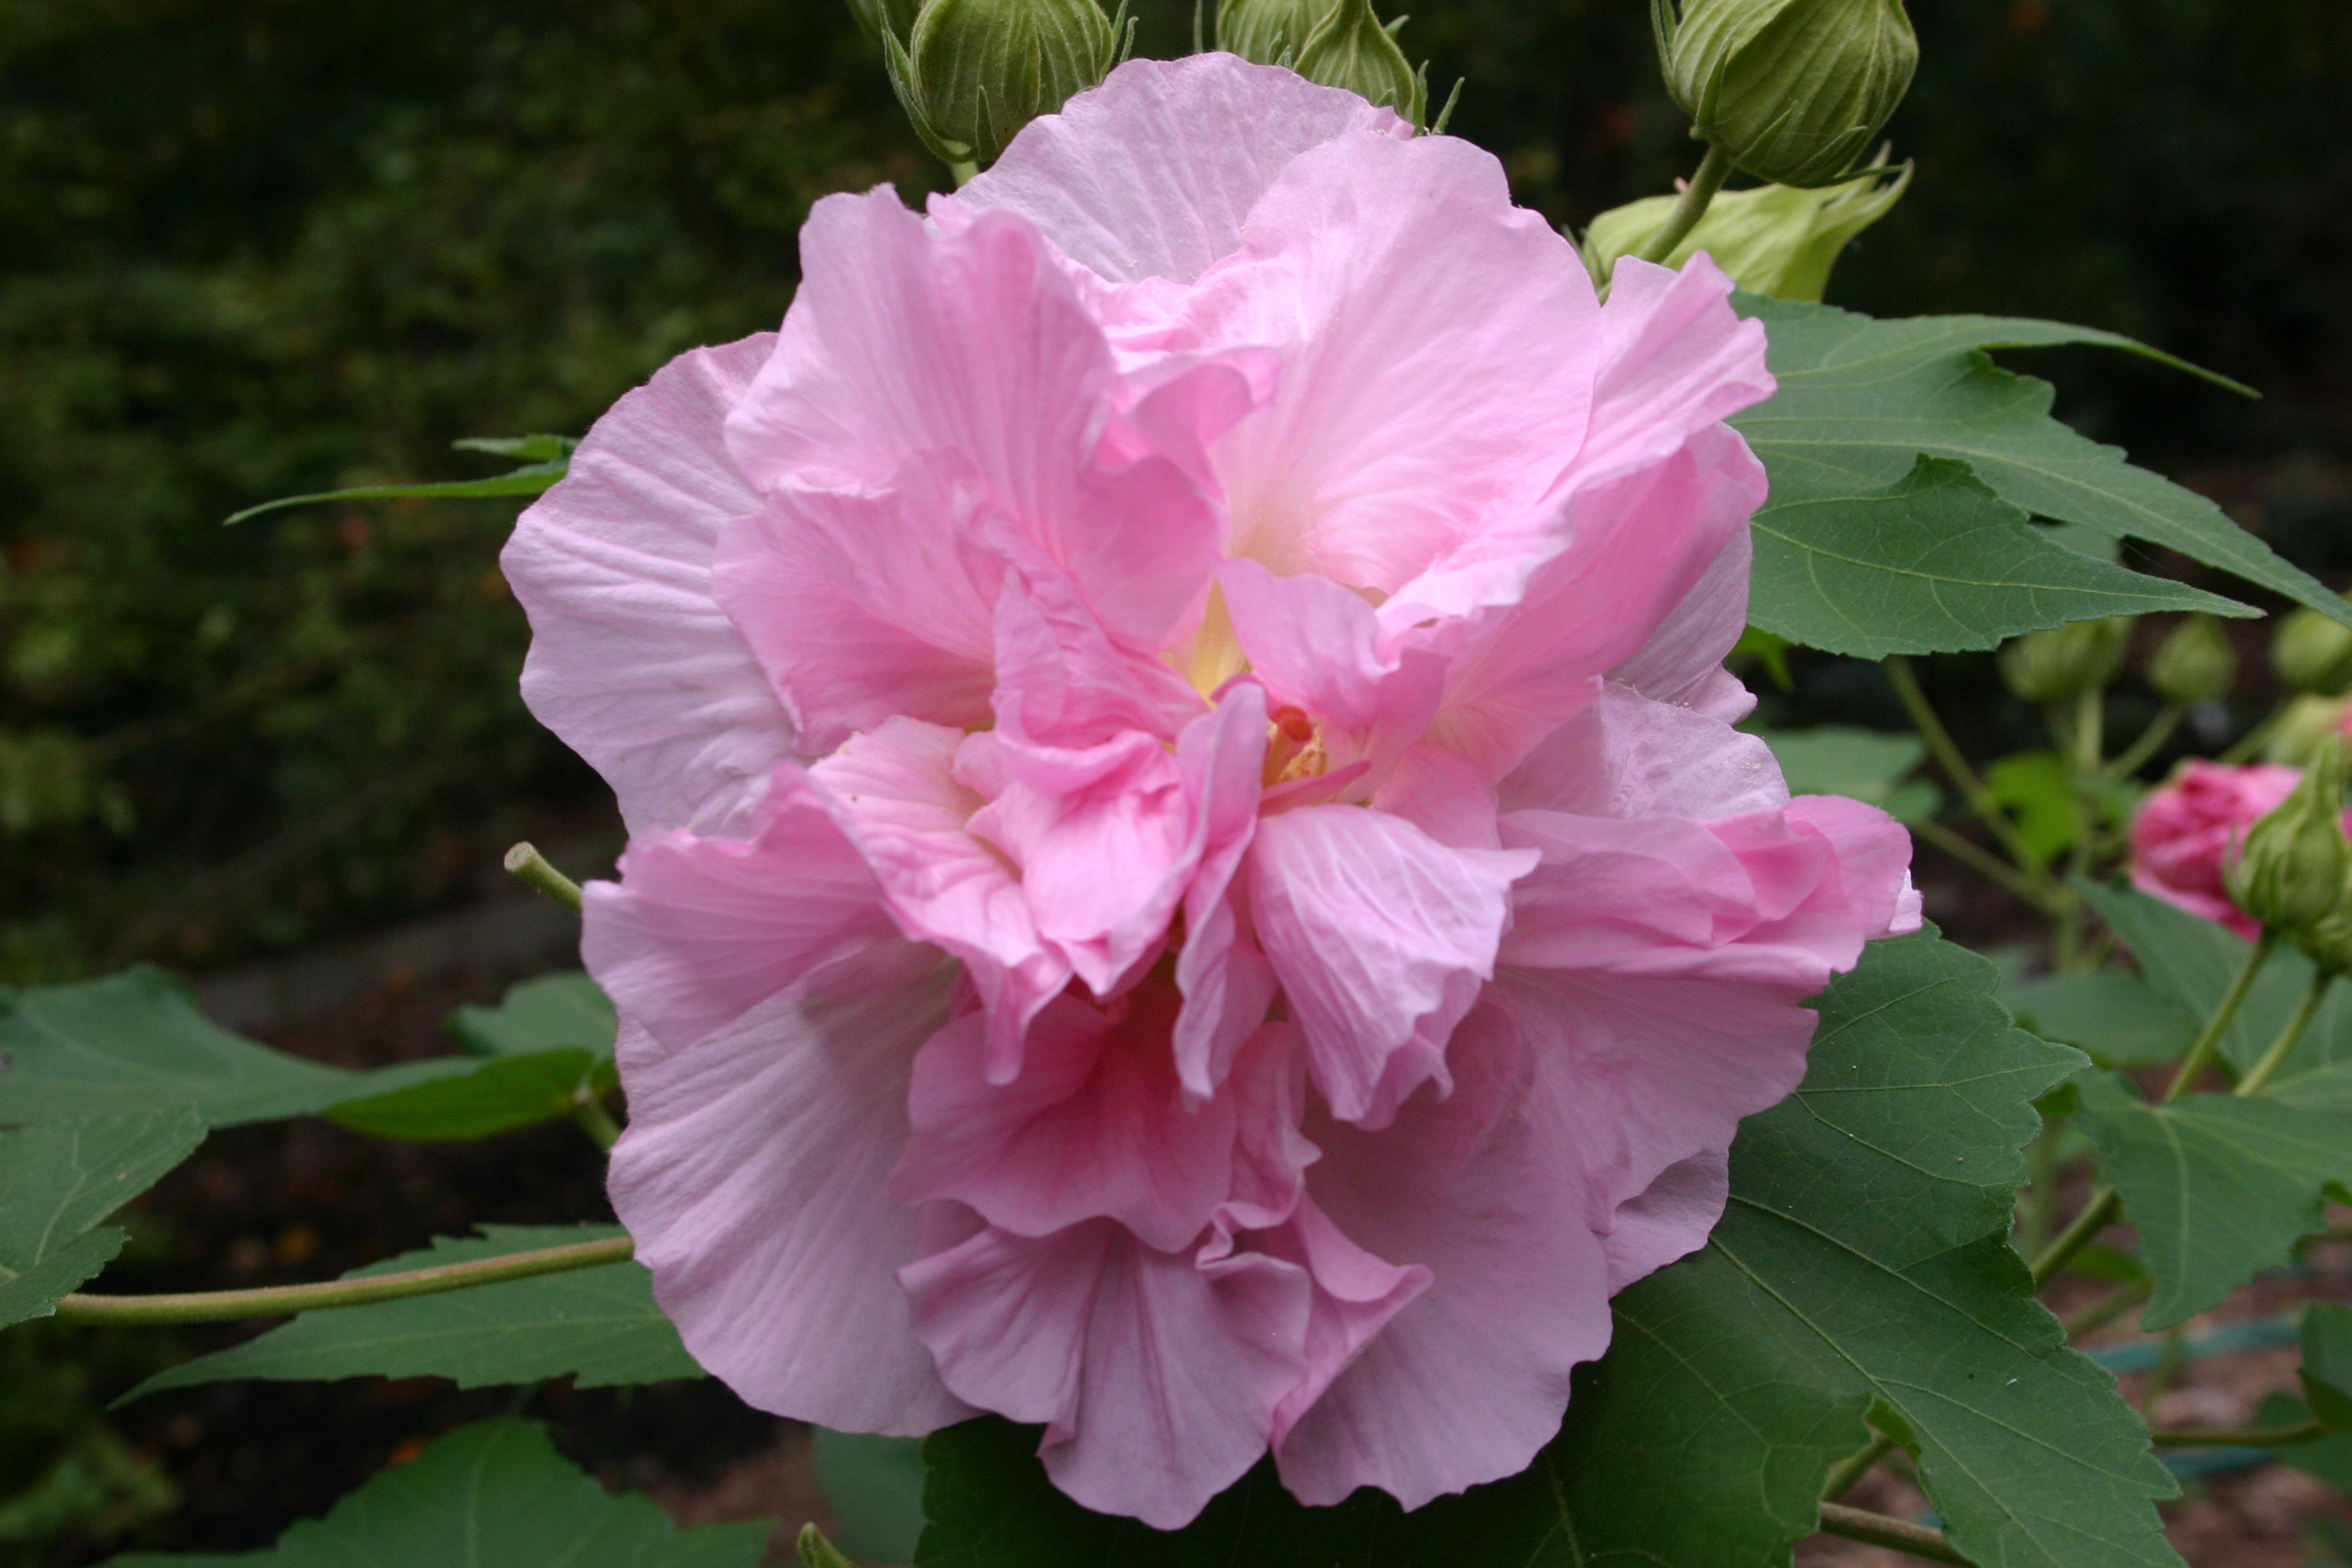
Botanically this is Hibiscus mutabilis. As with the Confederate Jasmine this is neither a confederate, it too is originally from China,  nor is it a rose, it is in the Hibiscus family.
One of the most interesting things about this flowering shrub are the flowers themselves. Three distinct colors appear on the bush simultaneously as the blooms color cycle independent of one another. They open white or pink, and change to deep red by evening. 
This can be a large shrub or small multi-stemmed tree that grows to 15 ft high with about a 10 ft spread. USDA Zones 7-9
This plant likes full sun to partial shade. It thrives on regular watering but is very drought tolerant. It is propagated very easily by cuttings.
 This is a great plant to add to your landscape as little to no care is required. This shrub truly takes care of itself and is adaptable to most locations and soil conditions. One last tidbit about the Confederate Rose. You can learn a lot by the plants botanical name, (mutabilis), it is mutable, it's flowers changing color with age.
The last plant I would like to discuss is the Confederate Rose.
I know, I did that one already. This is the Confederate Rose Agave. See how common names can screw you up?


There is some confusion as to the exact botanical name, it is believed to be a hybrid, possibly a cross of Agave parrasana and Agave Parryii.
Either way, it is a very nice plant.  It is considered a medium sized Agave which grows in clustering rosettes up to 1 foot across and 1-2 feet high. It has deep blue/gray short, stubby leaves, with sharp reddish teeth on each leaf. USDA Zones 8-11
As with all succulents this thing is VERY drought tolerant. However, many people do not realize that this plant is so tough that it is highly frost tolerant, it can handle down to below 20 degrees and withstand the blazing hot summer sun. Propagation is usually done by the pups that it sends out.
So there you have it, The Confederates.
Not a story of division between the states nor a story of war. Just some very good, relatively problem free, plants for a Southern Landscape. 
I hope you enjoyed this article, for now, this Yankee is off to feed some Southern mosquitoes, rumor has it that they think Yankees are delicious.
Happy Growing!
Darren